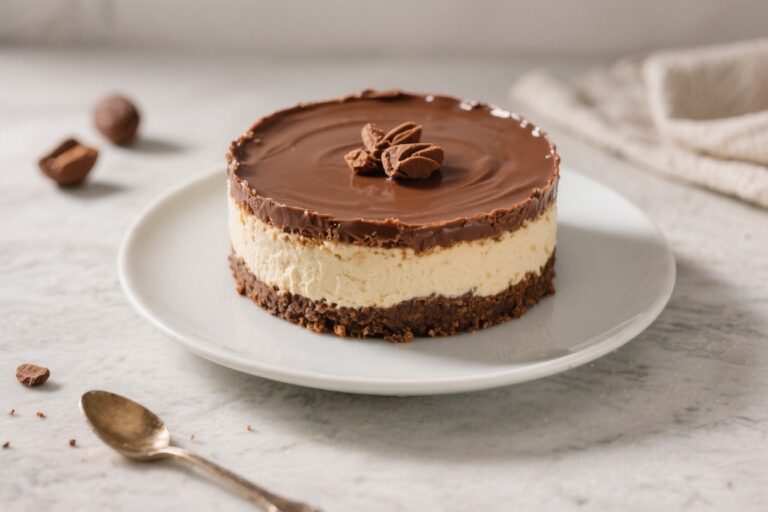
Mocha Icebox Cake – A Cool, No-Bake Treat With Coffee and Chocolate
Mocha icebox cake is one of those desserts that feels fancy but is secretly effortless. Layers of chocolate wafers and coffee-kissed whipped cream soften in the fridge, turning into a cake that slices like a dream. It’s cool, creamy, and deeply satisfying, with just enough espresso flavor to make it feel grown-up.
Best of all, you don’t need an oven, special tools, or a ton of time. Make it the day before, let the fridge do the work, and enjoy the compliments.

Mocha Icebox Cake – A Cool, No-Bake Treat With Coffee and Chocolate
Ingredients
Method
- Chill your tools. Place a large mixing bowl and beaters in the fridge or freezer for 10–15 minutes. Cold equipment helps the cream whip faster and hold its shape.
- Make the mocha mixture. In a small bowl, whisk cooled espresso, cocoa powder, vanilla, and a pinch of salt until smooth.Set aside.
- Beat the mascarpone. In the chilled bowl, beat the mascarpone or cream cheese with the sugar until creamy and smooth. Don’t overbeat—just blend out any lumps.
- Whip the cream. Pour in the heavy cream and beat on medium-high until you get soft peaks. Add the mocha mixture and continue beating until you reach sturdy, spreadable peaks.It should be thick but not grainy.
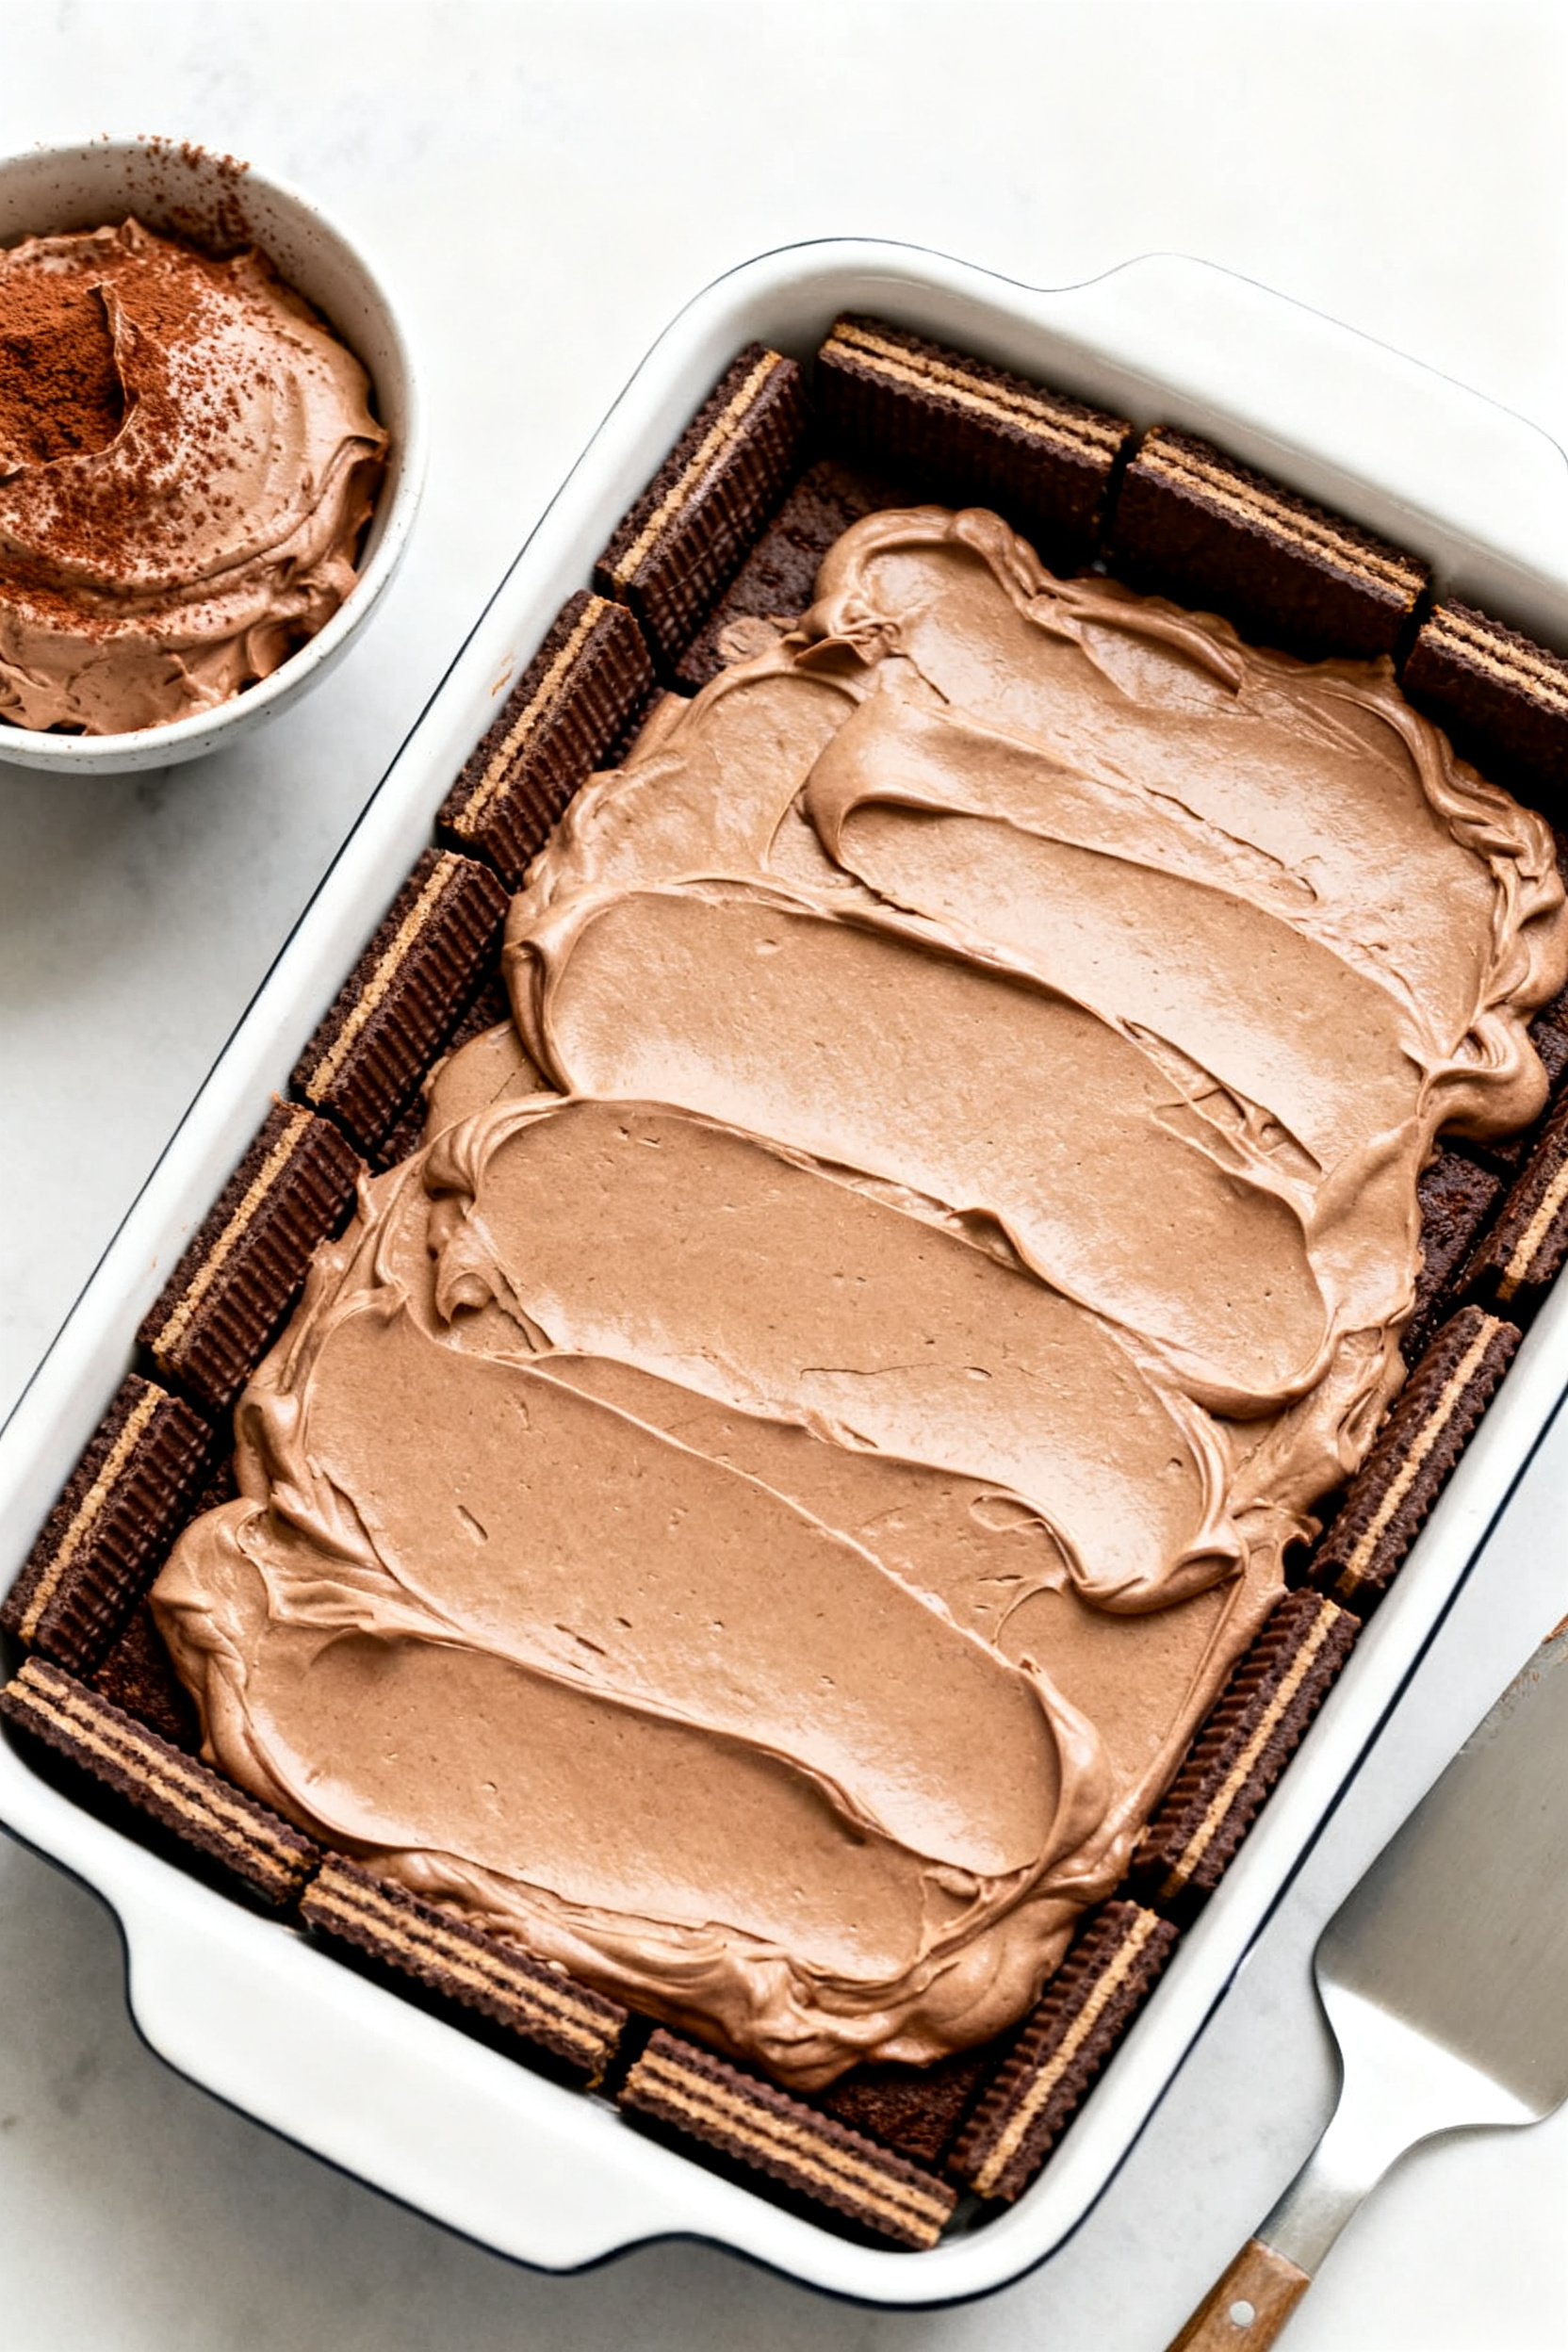
- Start layering. Spread a thin layer of mocha cream on the bottom of a 9×13-inch dish or a 9-inch springform pan. This helps the first layer of cookies stick.
- Add the wafers. Arrange a single layer of chocolate wafers over the cream, leaving no big gaps. Break a few cookies if needed to fill the edges.
- Build it up. Spread about 1 cup of mocha cream evenly over the wafers.Repeat with another layer of wafers and cream. Continue until you have 4–5 layers, finishing with cream on top.
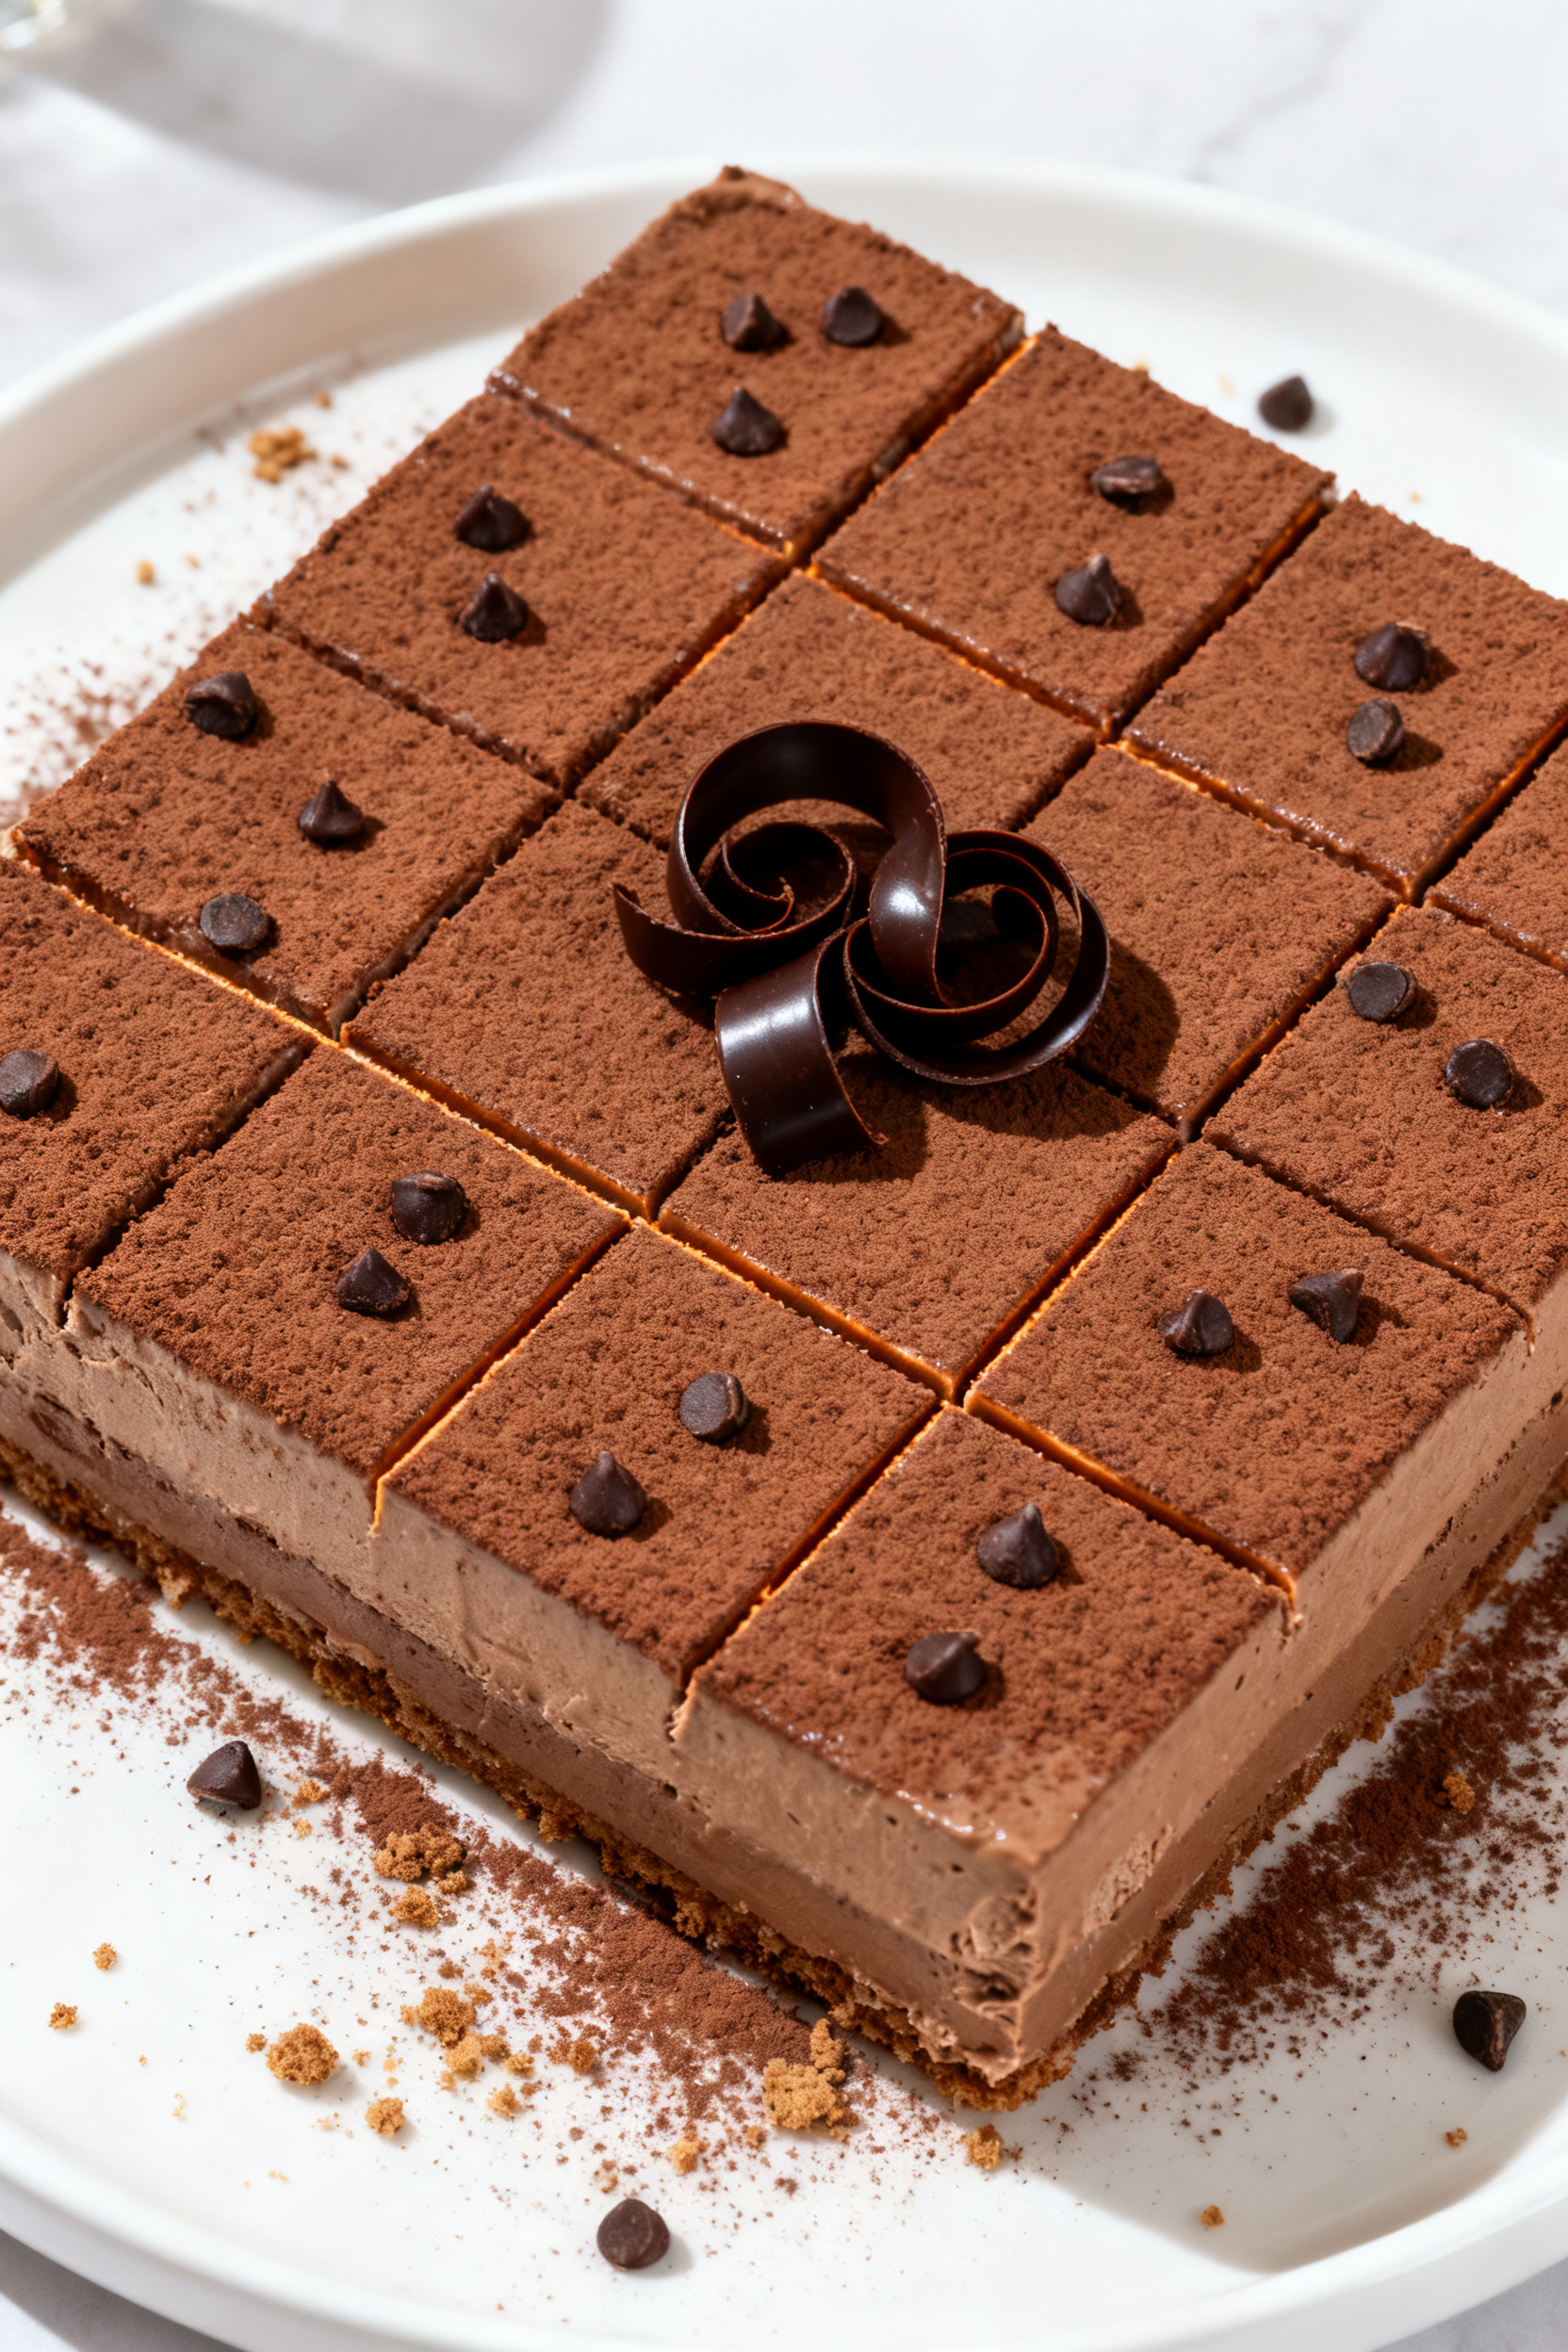
- Decorate. Dust the top with cocoa powder and add chocolate shavings or mini chips if you like. A few curls of dark chocolate make it look polished.
- Chill to set. Cover and refrigerate for at least 6 hours, but overnight (8–12 hours) is best.The cookies will soften and meld into a cake-like texture.
- Slice and serve. Run a warm knife around the edges if using a springform pan. Slice cleanly with a sharp knife and wipe between cuts for neat pieces.
What Makes This Special
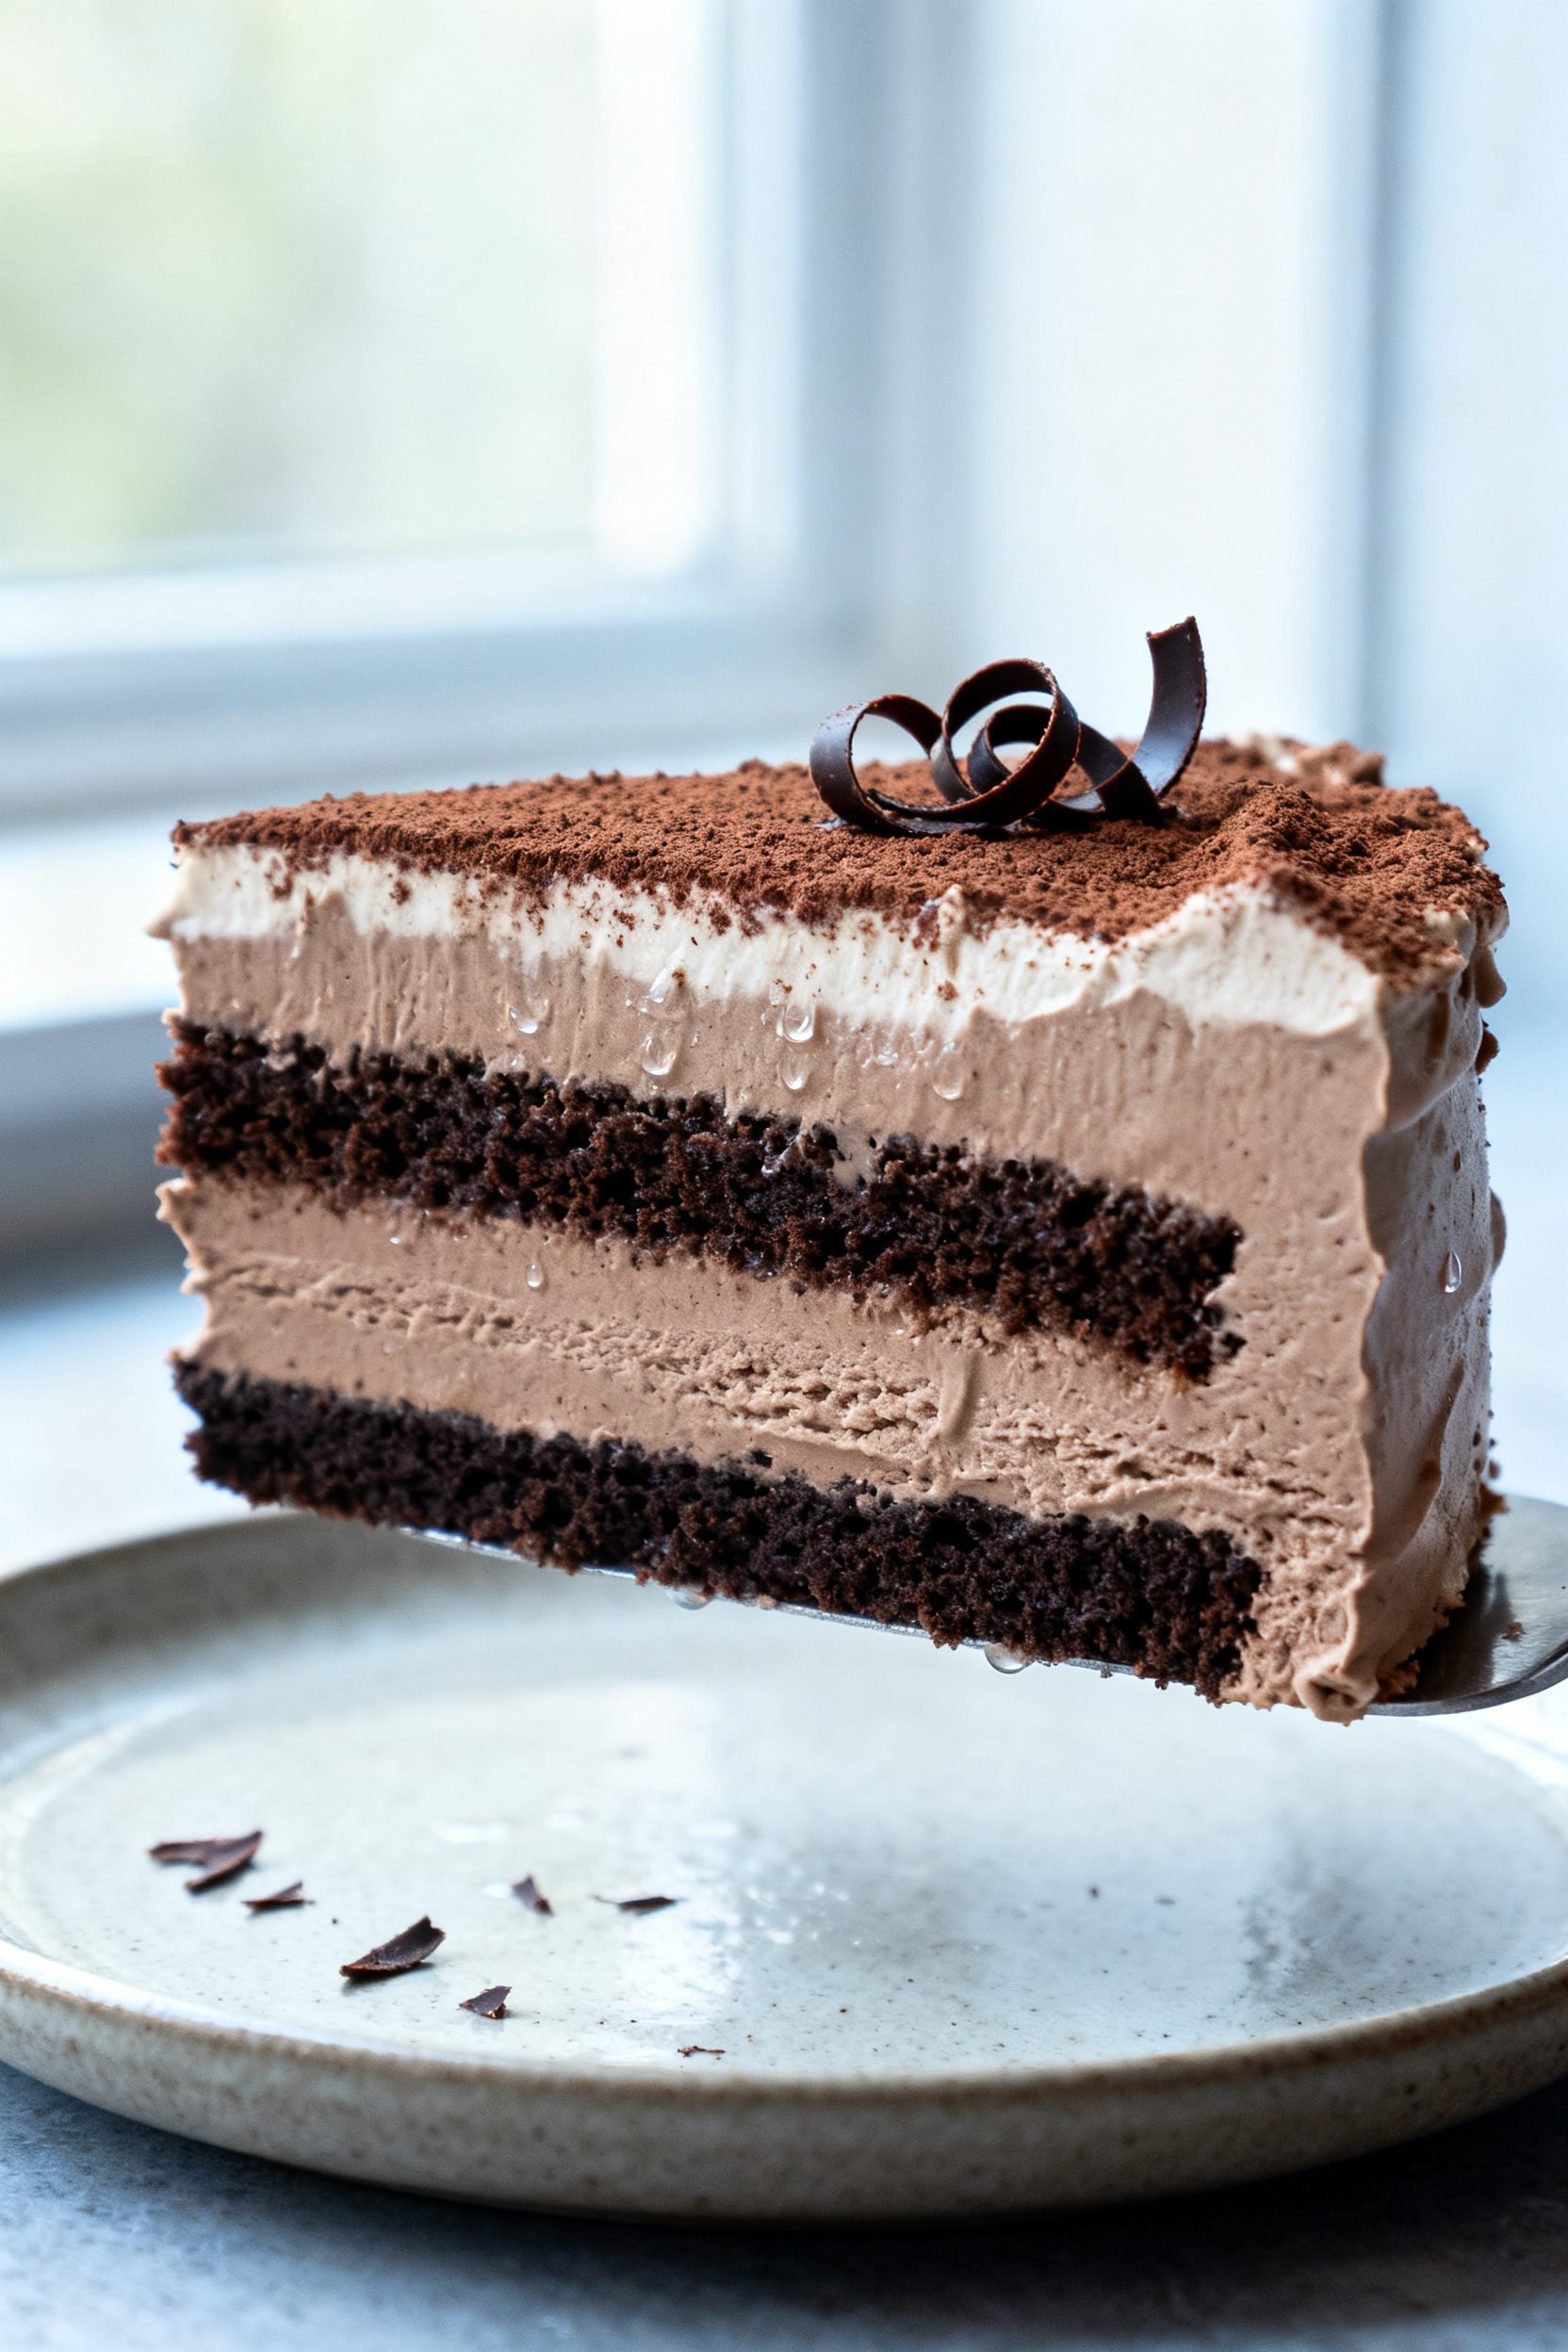
This cake hits that perfect balance of rich and refreshing. The combination of chocolate and coffee gives it a classic mocha profile, while the creamy texture keeps it light enough to enjoy after a big meal.
It’s also incredibly forgiving—no precise baking times or complicated steps.
Because it’s a no-bake dessert, it’s ideal for warm days or busy weeks. You can dress it up with chocolate shavings or keep it rustic and simple. Either way, the result is a sliceable, icebox-style cake that tastes like you fussed when you definitely didn’t.
What You’ll Need (Ingredients)
- Chocolate wafer cookies (about 12–14 ounces).
Thin, crisp wafers work best.
- Heavy whipping cream (4 cups). This is your main filling.
- Mascarpone or cream cheese (8 ounces, softened). For extra body and a subtle tang.
- Granulated sugar (1/2 cup) or powdered sugar (3/4 cup).
Powdered blends more smoothly.
- Espresso or strong coffee (1/3 cup, cooled). For that bold mocha flavor.
- Unsweetened cocoa powder (2–3 tablespoons). To deepen the chocolate taste.
- Vanilla extract (1–2 teaspoons).
Rounds out the flavors.
- Salt (a pinch). Enhances sweetness and balances bitterness.
- Optional add-ins: chocolate shavings, mini chocolate chips, shaved dark chocolate, cacao nibs, or a drizzle of chocolate sauce.
Instructions
- Chill your tools. Place a large mixing bowl and beaters in the fridge or freezer for 10–15 minutes. Cold equipment helps the cream whip faster and hold its shape.
- Make the mocha mixture. In a small bowl, whisk cooled espresso, cocoa powder, vanilla, and a pinch of salt until smooth.
Set aside.
- Beat the mascarpone. In the chilled bowl, beat the mascarpone or cream cheese with the sugar until creamy and smooth. Don’t overbeat—just blend out any lumps.
- Whip the cream. Pour in the heavy cream and beat on medium-high until you get soft peaks. Add the mocha mixture and continue beating until you reach sturdy, spreadable peaks.
It should be thick but not grainy.
- Start layering. Spread a thin layer of mocha cream on the bottom of a 9×13-inch dish or a 9-inch springform pan. This helps the first layer of cookies stick.
- Add the wafers. Arrange a single layer of chocolate wafers over the cream, leaving no big gaps. Break a few cookies if needed to fill the edges.
- Build it up. Spread about 1 cup of mocha cream evenly over the wafers.
Repeat with another layer of wafers and cream. Continue until you have 4–5 layers, finishing with cream on top.
- Decorate. Dust the top with cocoa powder and add chocolate shavings or mini chips if you like. A few curls of dark chocolate make it look polished.
- Chill to set. Cover and refrigerate for at least 6 hours, but overnight (8–12 hours) is best.
The cookies will soften and meld into a cake-like texture.
- Slice and serve. Run a warm knife around the edges if using a springform pan. Slice cleanly with a sharp knife and wipe between cuts for neat pieces.
Keeping It Fresh
Store the cake covered in the fridge for up to 3–4 days. The texture actually improves on day two, then gradually softens.
If you added delicate toppings like chocolate curls, save a few to refresh the top right before serving.
For longer storage, you can freeze slices tightly wrapped for up to 1 month. Thaw in the fridge overnight. The cream stays smooth, and the flavor remains rich.
Benefits of This Recipe
- No oven required: Perfect for hot days or when you want a low-effort dessert.
- Make-ahead friendly: Chill it overnight and free up your day-of prep time.
- Customizable flavor: Adjust the coffee strength, sweetness, and toppings to suit your taste.
- Elegant presentation: Clean slices with visible layers look impressive at potlucks and dinners.
- Reliable for beginners: Minimal technique, big payoff.
Great starter dessert for new cooks.
Common Mistakes to Avoid
- Using warm coffee: Hot liquid can deflate the cream and create a runny mix. Always cool it completely.
- Underwhipping the cream: If it’s too soft, the layers won’t hold. Aim for thick, sturdy peaks that still look smooth.
- Skipping the chill time: Less than 6 hours won’t fully soften the wafers.
Overnight is ideal for a cake-like texture.
- Over-sweetening: Remember the cookies are sweet. Taste the cream before adding more sugar.
- Using thick cookies: Thin wafers soften best. If using thicker cookies, allow extra chill time.
Alternatives
- Cookie swap: Try chocolate graham crackers, chocolate ladyfingers, or even Oreo thins (without the filling) if wafers are hard to find.
- Dairy-free: Use full-fat coconut cream (chilled and whipped) plus a dairy-free cream cheese alternative.
Sweeten with powdered sugar to help stabilize.
- Alcohol kick: Add 1–2 tablespoons of coffee liqueur (like Kahlúa) to the mocha mixture for a boozy note.
- Less coffee: Replace half the espresso with milk for a milder mocha that’s more kid-friendly.
- Textural extras: Sprinkle a thin layer of finely chopped toasted hazelnuts or cacao nibs between the middle layers for crunch.
- Individual servings: Layer the cream and cookies in small jars or ramekins. Chill 4–6 hours.
FAQ
Can I make this without mascarpone or cream cheese?
Yes. You can use only whipped cream and sugar.
To keep the structure firm, add 1 tablespoon of instant pudding mix or 1–2 teaspoons of unflavored gelatin bloomed in a little water and cooled, then whip it in.
What if I can’t find chocolate wafer cookies?
Chocolate grahams or Oreo thins (scrape out the cream) work well. Just be aware that thicker cookies need more time to soften, so chill overnight or even up to 18 hours.
How strong should the coffee be?
Strong but smooth. A double shot of espresso or very strong brewed coffee is ideal.
If you’re sensitive to bitterness, use a medium roast and add a touch more sugar.
Can I make it ahead for a party?
Absolutely. Make it the day before and keep it covered in the fridge. Add final decorations just before serving for the cleanest look.
How do I get clean slices?
Use a long, sharp knife.
Warm it briefly under hot water and wipe it dry before each cut. This keeps the layers neat and the top smooth.
Is there a way to reduce the sweetness?
Cut the sugar by a couple of tablespoons and use dark cocoa powder. You can also use bittersweet chocolate shavings instead of milk chocolate on top.
Can I use instant coffee instead of espresso?
Yes.
Dissolve 1–2 teaspoons of instant espresso powder in 1/3 cup of hot water, then cool completely before adding to the cream.
What pan size works best?
A 9×13-inch dish gives easy, square slices and plenty of servings. A 9-inch springform pan creates a taller, round cake that looks striking on a dessert table.
Wrapping Up
Mocha icebox cake is proof that simple can be spectacular. With no baking, minimal prep, and flavors everyone loves, it’s a reliable go-to for gatherings and weeknight treats alike.
Make it ahead, let the layers mingle, and serve chilled. The result is smooth, chocolatey, and just bold enough with coffee to keep each bite interesting. Keep this recipe in your back pocket—you’ll use it often.
Printable Recipe Card
Want just the essential recipe details without scrolling through the article? Get our printable recipe card with just the ingredients and instructions.