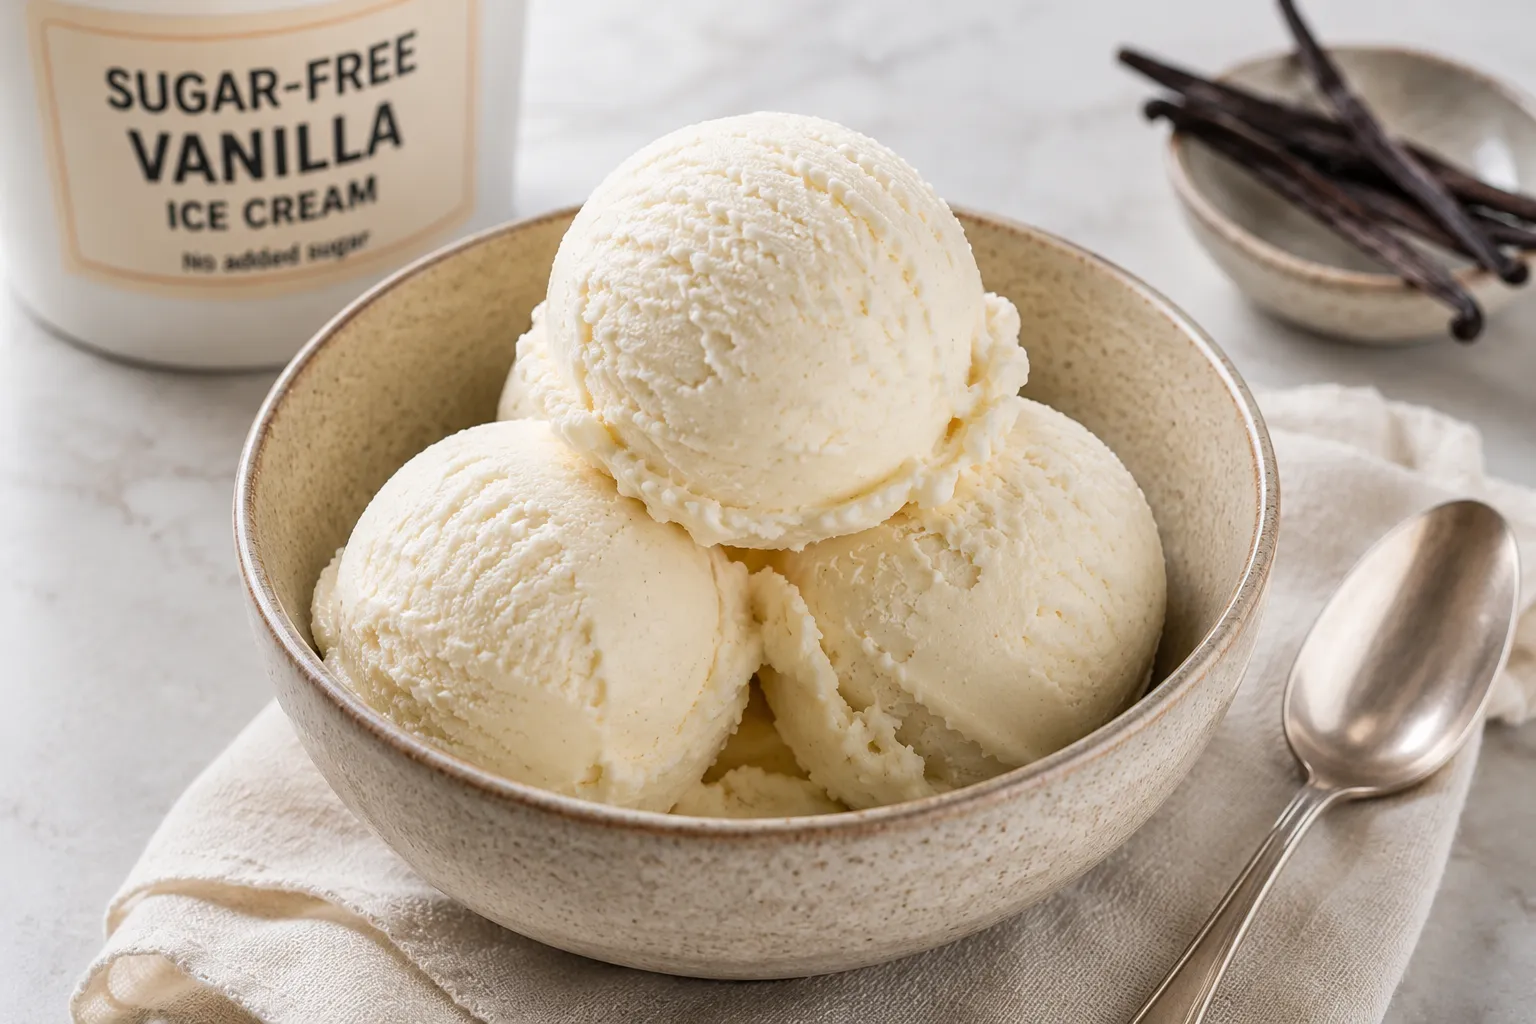
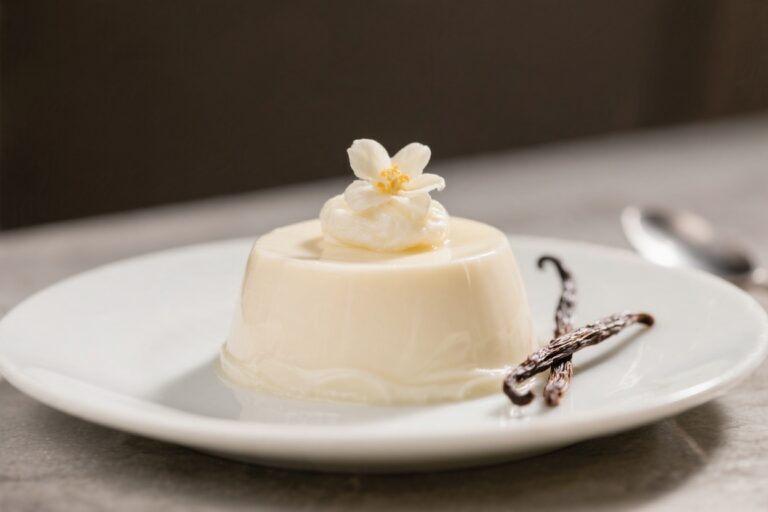
Skip the sugar without skipping the joy. This vanilla ice cream is smooth, rich, and sweet enough to feel like the real deal. You don’t need a complicated machine or rare ingredients to make it work—just a few pantry basics and a little patience.Whether you’re watching your sugar intake or just want a lighter dessert, this is the kind of treat that keeps everyone happy. And yes, it actually tastes like proper ice cream.
Sugar-Free Ice Cream (Vanilla) - Creamy, Simple, and Satisfying
Vanilla extract (2–3 teaspoons) or vanilla bean paste
Egg yolks (4), optional for a custard-style base
Xanthan gum (1/4 teaspoon) or unflavored gelatin (1 teaspoon bloomed), optional but helpful
Pinch of fine sea salt
Vodka or sugar-free vanilla liqueur (1 tablespoon), optional for softness
Method
Choose your style: Decide between a custard base (richer, silkier) or a Philadelphia-style base (no eggs, lighter). If using eggs, you’ll cook a quick custard.If not, you’ll blend and chill.
For custard-style: In a medium saucepan, whisk 1 cup cream, all the milk, sweetener, and salt. Warm over medium heat until steaming.
Temper the yolks: In a bowl, whisk egg yolks. Slowly drizzle in 1/2 cup of the hot mixture while whisking, then pour back into the pot.
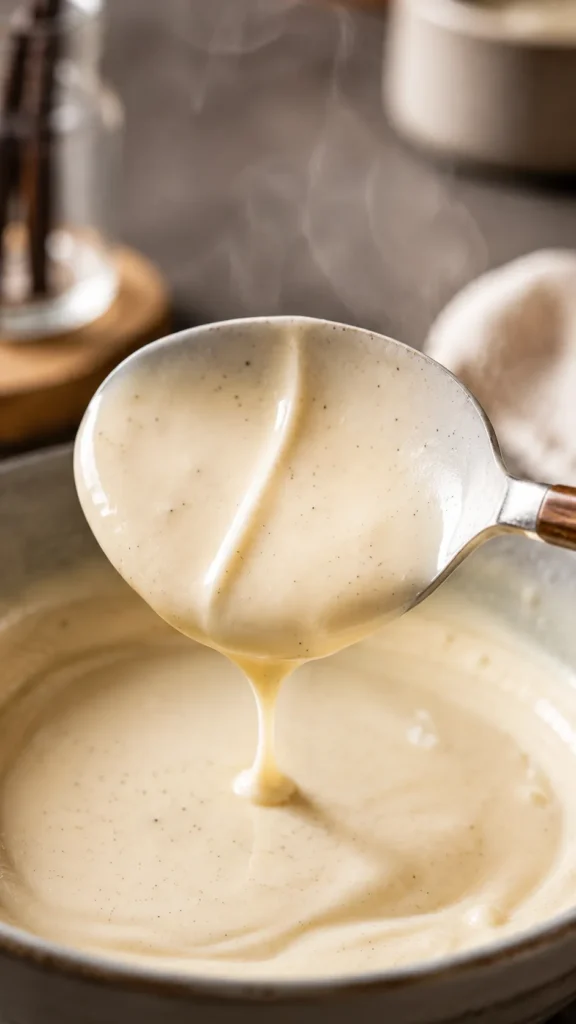
Cook to thicken: Stir constantly over medium-low heat until the mixture lightly coats the back of a spoon, about 5–7 minutes.Do not boil. Remove from heat.
Add stabilizer: Whisk in xanthan gum (sprinkle very lightly to avoid clumps) or stir in pre-bloomed gelatin until dissolved. This step helps keep the ice cream soft and smooth.
Finish the base: Stir in remaining 1 cup cream, vanilla, and vodka if using.Taste and adjust sweetness—remember flavors dull slightly when frozen.
Chill thoroughly: Strain the base into a clean bowl, cover, and refrigerate until very cold—at least 4 hours, ideally overnight. A cold base churns better and traps more air.
For no-egg style: Whisk all ingredients (including stabilizer) in a blender until smooth. Chill as above.
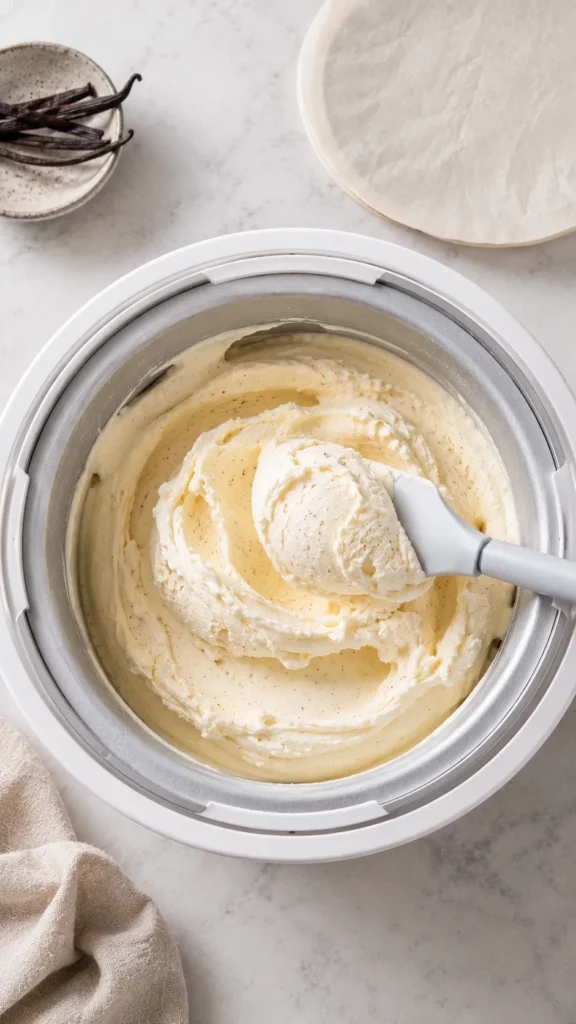
Churn: Pour the cold base into your ice cream maker and churn per manufacturer’s instructions, usually 20–25 minutes, until it looks like soft-serve.
Freeze to set: Transfer to a shallow, airtight container.Press parchment on the surface to prevent ice crystals. Freeze 3–4 hours for scoopable firmness.
No-machine method: Freeze the chilled base in a shallow pan. Stir vigorously every 30–45 minutes for 3–4 hours, breaking up ice crystals.A hand mixer helps. It won’t be as airy, but it’s still delicious.
Serve: Let the container sit at room temperature for 5–10 minutes before scooping. Sprinkle a pinch of flaky salt on top for a flavor boost, if you like.
This ice cream leans on fat and a smart sweetener combo for body and flavor. Using a blend of cream and milk keeps it creamy without turning icy.A small amount of a neutral alcohol, like vodka, helps prevent rock-hard freezing. A touch of xanthan gum or gelatin boosts texture and scoopability. And the vanilla—real extract or paste—brings that classic, nostalgic flavor that makes every bite feel like the best part of summer.
Shopping List (Ingredients)
Heavy cream (2 cups)
Whole milk (1 cup)
Allulose or erythritol (1/2 cup; see notes below)
Vanilla extract (2–3 teaspoons) or vanilla bean paste
Egg yolks (4), optional for a custard-style base
Xanthan gum (1/4 teaspoon) or unflavored gelatin (1 teaspoon bloomed), optional but helpful
Pinch of fine sea salt
Vodka or sugar-free vanilla liqueur (1 tablespoon), optional for softness
Sweetener note: Allulose gives the smoothest texture and least aftertaste.Erythritol is fine but can make ice cream a bit icier. You can also use a monk fruit–allulose blend.
Step-by-Step Instructions
Choose your style: Decide between a custard base (richer, silkier) or a Philadelphia-style base (no eggs, lighter). If using eggs, you’ll cook a quick custard.If not, you’ll blend and chill.
For custard-style: In a medium saucepan, whisk 1 cup cream, all the milk, sweetener, and salt. Warm over medium heat until steaming.
Temper the yolks: In a bowl, whisk egg yolks. Slowly drizzle in 1/2 cup of the hot mixture while whisking, then pour back into the pot.
Cook to thicken: Stir constantly over medium-low heat until the mixture lightly coats the back of a spoon, about 5–7 minutes.Do not boil. Remove from heat.
Add stabilizer: Whisk in xanthan gum (sprinkle very lightly to avoid clumps) or stir in pre-bloomed gelatin until dissolved. This step helps keep the ice cream soft and smooth.
Finish the base: Stir in remaining 1 cup cream, vanilla, and vodka if using.Taste and adjust sweetness—remember flavors dull slightly when frozen.
Chill thoroughly: Strain the base into a clean bowl, cover, and refrigerate until very cold—at least 4 hours, ideally overnight. A cold base churns better and traps more air.
For no-egg style: Whisk all ingredients (including stabilizer) in a blender until smooth. Chill as above.
Churn: Pour the cold base into your ice cream maker and churn per manufacturer’s instructions, usually 20–25 minutes, until it looks like soft-serve.
Freeze to set: Transfer to a shallow, airtight container.Press parchment on the surface to prevent ice crystals. Freeze 3–4 hours for scoopable firmness.
No-machine method: Freeze the chilled base in a shallow pan. Stir vigorously every 30–45 minutes for 3–4 hours, breaking up ice crystals.A hand mixer helps. It won’t be as airy, but it’s still delicious.
Serve: Let the container sit at room temperature for 5–10 minutes before scooping. Sprinkle a pinch of flaky salt on top for a flavor boost, if you like.
Keeping It Fresh
Store your ice cream in an airtight, shallow container to limit air exposure and speed softening when serving.Press a piece of parchment or plastic wrap directly on the surface to reduce ice crystals. Keep it toward the back of the freezer where temperatures are steadier. For best flavor and texture, enjoy within 2–3 weeks.If it firms up too much, a quick 10-minute rest on the counter brings it back to perfect scooping texture.
Health Benefits
This recipe skips refined sugar, which can help stabilize energy and reduce added-sugar intake. Using allulose or monk fruit–based blends keeps it sweet without the same blood sugar spike as traditional sugar. The fat from cream makes it more satisfying, so a small scoop goes a long way.If you choose the no-egg version and use lactose-free milk, it can be gentler for some people with sensitivities. As always, consider your own dietary needs and consult your healthcare provider if managing specific conditions.
What Not to Do
Don’t skip chilling the base. Warm or lukewarm mixture won’t churn properly and turns icy.
Don’t overdo the sweetener. Sugar alcohols can taste cooling and affect digestion. Start moderate and adjust.
Don’t boil the custard. Boiling scrambles the eggs and ruins texture.Low and slow is the way.
Don’t forget the salt. A small pinch heightens vanilla flavor and balances sweetness.
Don’t expect identical behavior to sugar-based ice cream. Sugar-free versions freeze firmer; the stabilizer and a splash of alcohol help, but a short thaw before scooping is normal.
Recipe Variations
Vanilla Bean Specks: Use 1 tablespoon vanilla paste or scrape 1 vanilla bean for intense aroma and those classic black flecks.
Salted Vanilla: Add an extra pinch of sea salt and finish with flaky salt just before serving.
French Vanilla (extra rich): Use 6 yolks instead of 4 for a deeper custard note.
Keto-Friendly: Use all heavy cream (3 cups) and skip the milk. Thin with 2–4 tablespoons unsweetened almond milk if needed.
Dairy-Light: Swap half the cream for half-and-half and add 1/2 teaspoon extra xanthan for body.
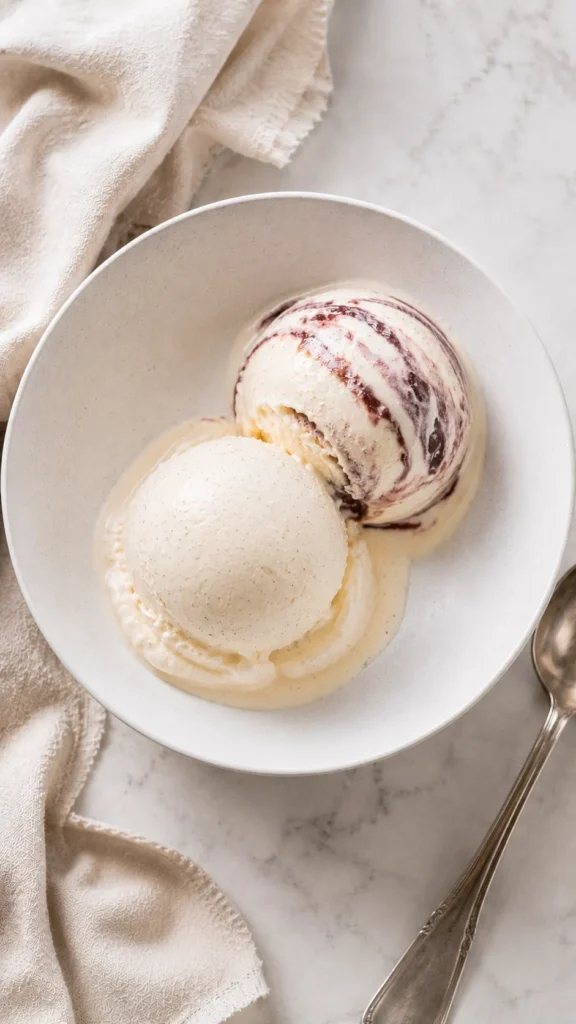
Swirls and Mix-Ins: Fold in a warm, sugar-free strawberry or chocolate sauce after churning, or add chopped toasted nuts in the last minute of churning.
Coffee Vanilla: Steep 1 tablespoon instant espresso in the warm base, then strain and proceed.
FAQ
Which sugar-free sweetener tastes best in ice cream?
Allulose is the top choice for smooth texture and clean sweetness. Monk fruit–allulose blends are great too.Erythritol works in a pinch but can crystallize and feel a bit icy.
Can I make it without an ice cream maker?
Yes. Use the no-machine method: freeze the base in a shallow pan and whisk vigorously every 30–45 minutes until set. It won’t be as airy, but the flavor and creaminess are still satisfying.
Why is my ice cream too hard?
Sugar-free bases freeze firmer.Add 1 tablespoon vodka, use xanthan gum or gelatin, and let it sit out 5–10 minutes before scooping. Allulose also helps keep it softer than other sweeteners.
Do I have to use eggs?
No. The no-egg version is quicker and still creamy, especially with a stabilizer.Eggs add richness and silkiness, but they’re optional.
Is this safe for people with diabetes?
It’s sugar-free and lower in net carbs when made with allulose or monk fruit blends. Still, portions matter, and dairy can impact individuals differently. Check labels and consult your healthcare provider if you track carbs closely.
Can I use coconut milk?
Yes.Full-fat canned coconut milk makes a rich, dairy-free base. Use two cans plus a bit of nut milk to lighten if needed, and keep the stabilizer for smooth texture.
How long should I chill the base?
At least 4 hours, but overnight is better. A fully chilled base traps more air during churning and freezes more evenly.
What’s the best container for storage?
A shallow, wide, airtight container helps with faster softening and reduces ice crystal formation.Press parchment directly on the surface before sealing.
Can I reduce the fat?
You can swap some cream for milk or half-and-half, but expect a firmer, slightly icier texture. A stabilizer becomes more important when reducing fat.
How do I avoid a grainy texture?
Use allulose if possible, dissolve sweetener fully in the warm base, strain before chilling, and add a tiny amount of xanthan or gelatin. Proper chilling and steady churning also help.
Wrapping Up
Sugar-Free Vanilla Ice Cream doesn’t have to be a compromise.With the right sweetener, a balanced base, and a few small tricks, you can churn out a pint that scoops beautifully and tastes like the classic you love. Keep a container in the freezer for weeknight cravings or easy entertaining. Once you master the base, the variations are endless—and all just as satisfying.
Printable Recipe Card
Want just the essential recipe details without scrolling through the article? Get our printable recipe card with just the ingredients and instructions.