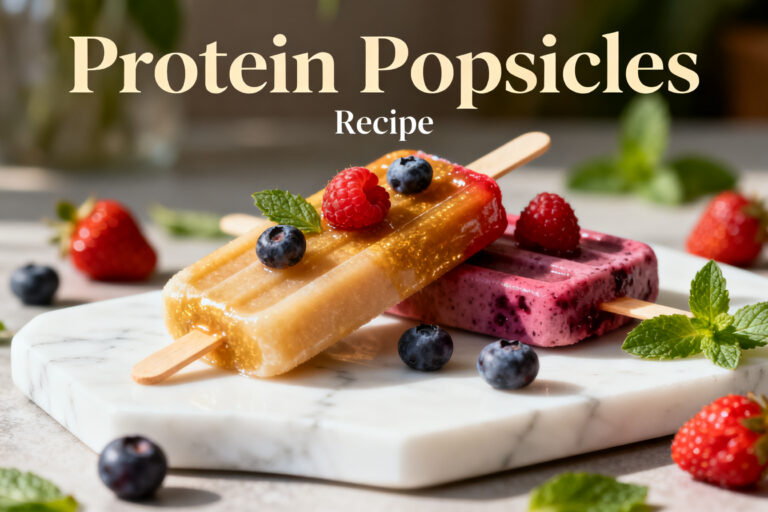
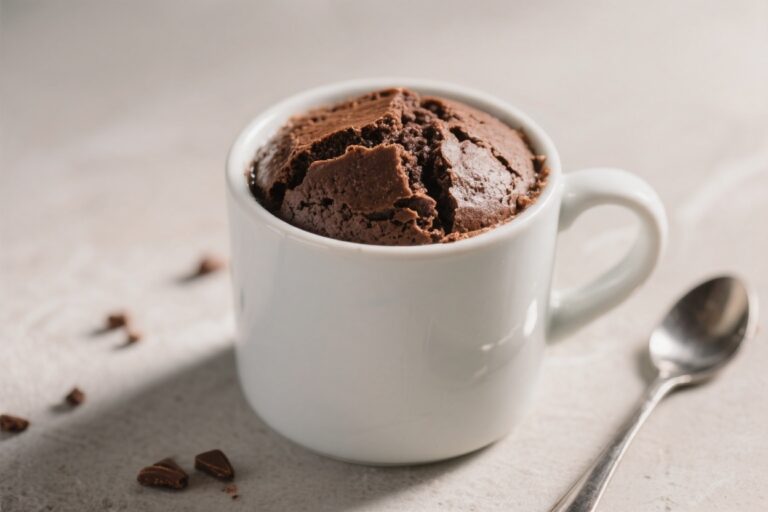
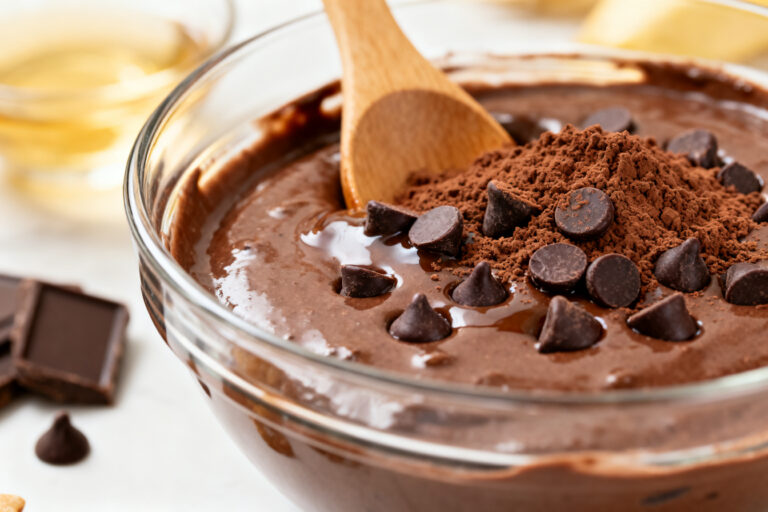
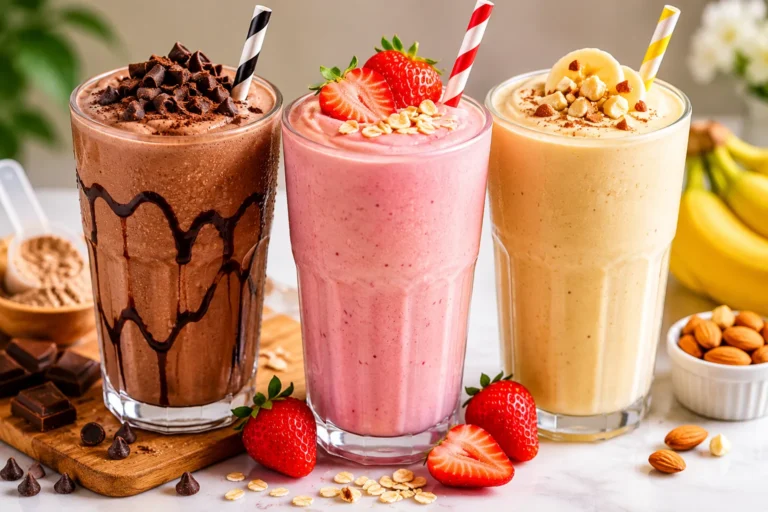
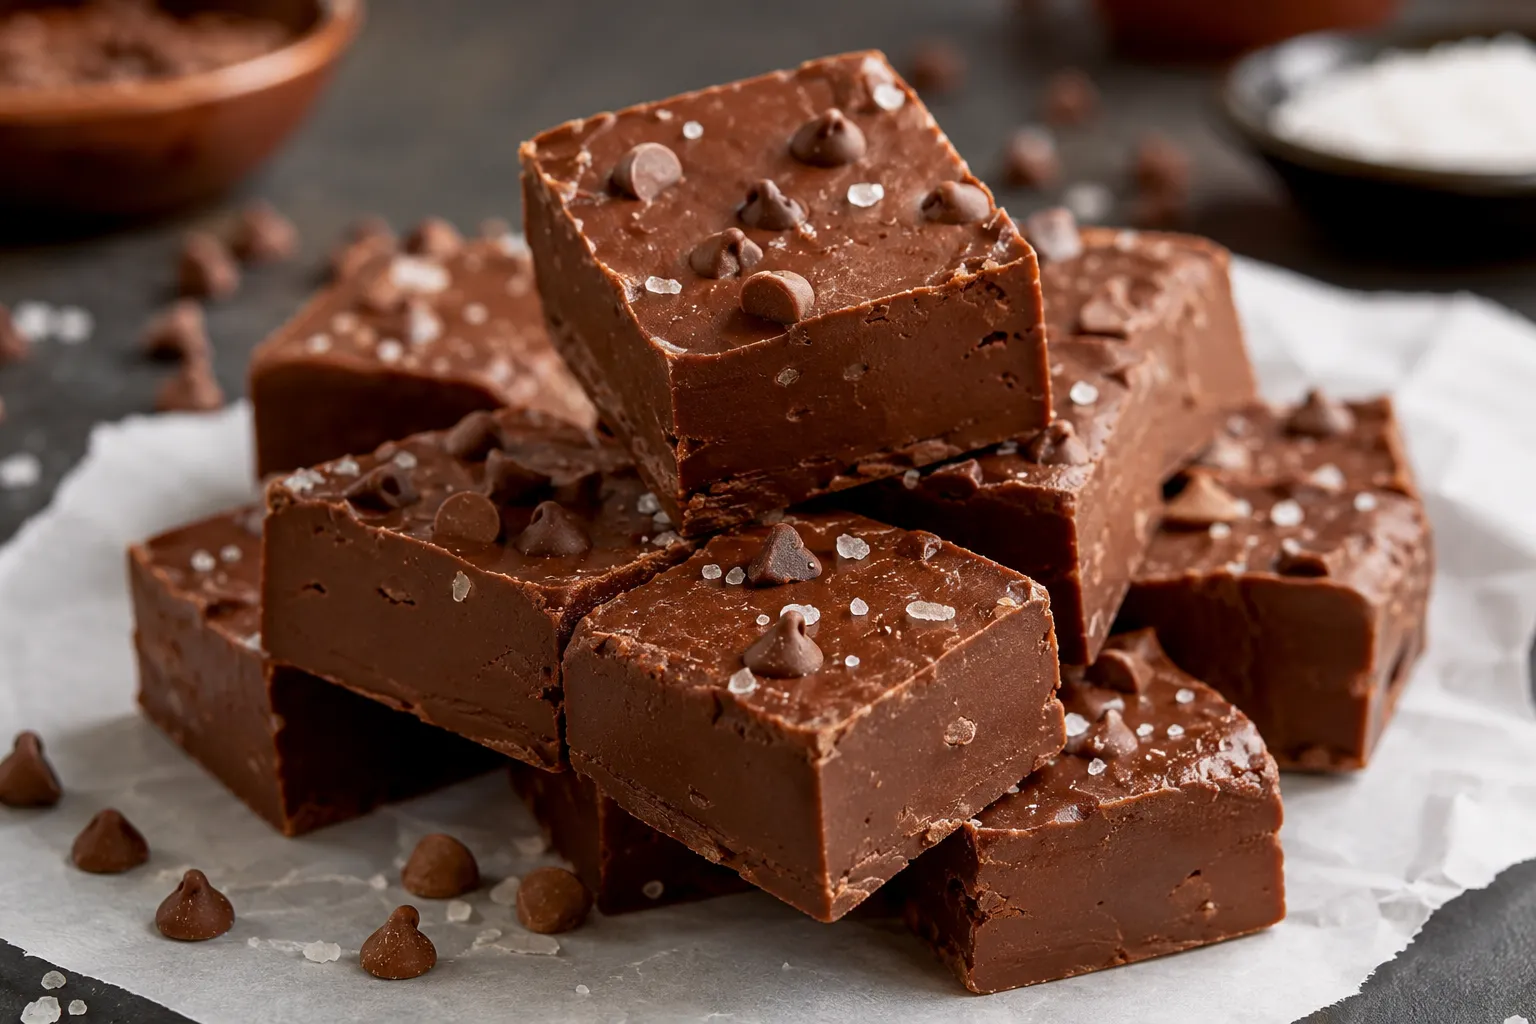
Protein Fudge – Rich, No-Bake Treat With a Nutritious Boost
This protein fudge is the kind of treat you keep reaching for without feeling weighed down. It’s creamy, chocolatey, and surprisingly simple to make—no stovetop candy thermometers or tricky steps required. You mix, press, chill, and slice.
That’s it. It tastes like dessert but brings enough protein to work as a satisfying snack or a sweet bite after the gym.
Protein Fudge - Rich, No-Bake Treat With a Nutritious Boost
Ingredients
Method
- Line an 8x8-inch pan with parchment paper, leaving overhang for easy lifting.Lightly mist with nonstick spray if you like.
- In a medium bowl, whisk together the melted coconut oil, peanut butter, maple syrup, vanilla, and salt until glossy and smooth.
- Sift in the cocoa powder to avoid lumps. Stir until fully incorporated.
- Add the protein powder in two additions, stirring well each time. The mixture should be thick, fudgy, and spreadable.If it seems too dry, add 1–2 tablespoons of milk (dairy or non-dairy) to loosen. If too loose, add 1–2 tablespoons more protein powder.
- Fold in any optional mix-ins. Taste and adjust sweetness or salt if needed.
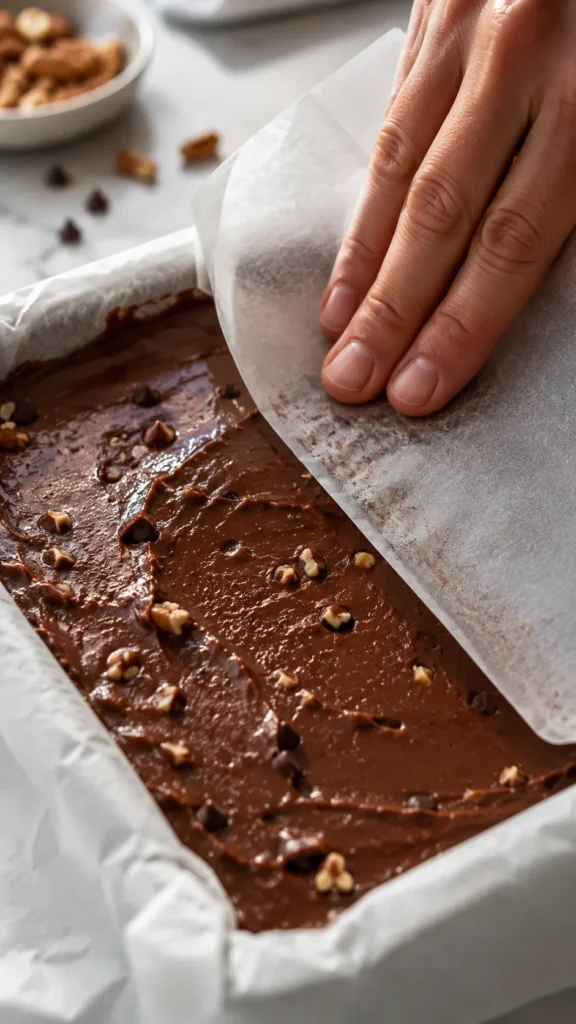
- Scrape the mixture into the prepared pan.Press it into an even layer using a spatula. For a smooth top, lay a piece of parchment over the surface and press with your hands.
- Chill in the refrigerator for 1–2 hours, or until firm enough to slice. For faster set, pop it in the freezer for 30–40 minutes.
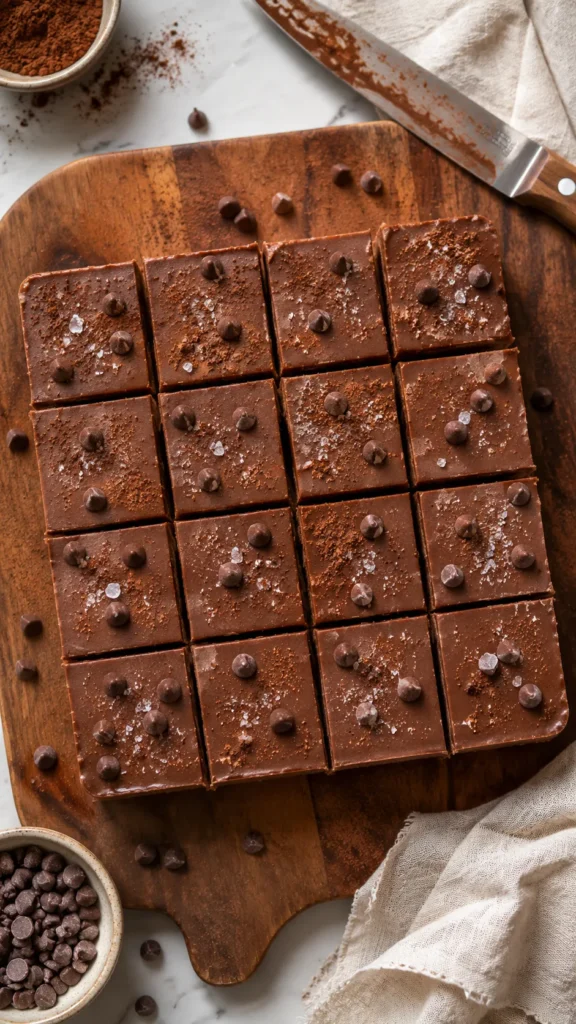
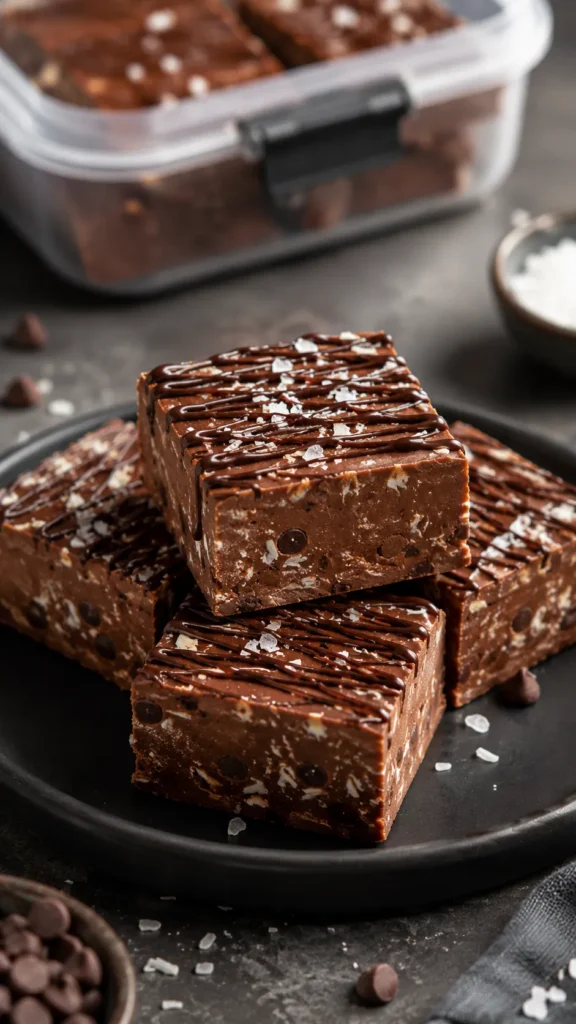
- Lift out using the parchment overhang and transfer to a cutting board.Slice into 16 small squares or 12 larger bars.
What Makes This Recipe So Good
- Fast and no-cook: Everything comes together in one bowl with basic pantry ingredients.
- Flexible: Use your favorite protein powder, nut butter, and sweetener. It’s easy to make dairy-free, vegan, or nut-free.
- Real fudge texture: Smooth, dense, and sliceable with a clean bite—not gummy or chalky.
- Meal-prep friendly: Keeps well in the fridge or freezer for grab-and-go snacks all week.
- Naturally sweetened options: You control the sweetness to suit your taste.
Ingredients
- 1 cup natural peanut butter or almond butter (smooth, well-stirred)
- 1/2 cup coconut oil, melted (or unsalted butter if not dairy-free)
- 1/3 to 1/2 cup maple syrup or honey (adjust to taste)
- 1/3 cup unsweetened cocoa powder
- 1 cup chocolate or vanilla protein powder (whey, casein, or plant-based)
- 1 teaspoon vanilla extract
- 1/4 teaspoon fine sea salt (omit if nut butter is salty)
- Optional mix-ins: 1/4 cup mini chocolate chips, chopped nuts, or shredded coconut
Instructions
- Line an 8×8-inch pan with parchment paper, leaving overhang for easy lifting.
Lightly mist with nonstick spray if you like.
- In a medium bowl, whisk together the melted coconut oil, peanut butter, maple syrup, vanilla, and salt until glossy and smooth.
- Sift in the cocoa powder to avoid lumps. Stir until fully incorporated.
- Add the protein powder in two additions, stirring well each time. The mixture should be thick, fudgy, and spreadable.
If it seems too dry, add 1–2 tablespoons of milk (dairy or non-dairy) to loosen. If too loose, add 1–2 tablespoons more protein powder.
- Fold in any optional mix-ins. Taste and adjust sweetness or salt if needed.
- Scrape the mixture into the prepared pan.
Press it into an even layer using a spatula. For a smooth top, lay a piece of parchment over the surface and press with your hands.
- Chill in the refrigerator for 1–2 hours, or until firm enough to slice. For faster set, pop it in the freezer for 30–40 minutes.
- Lift out using the parchment overhang and transfer to a cutting board.
Slice into 16 small squares or 12 larger bars.
Storage Instructions
- Refrigerator: Store in an airtight container for up to 10 days. Keep layers separated with parchment to prevent sticking.
- Freezer: Freeze for up to 3 months. Wrap portions individually or place parchment between pieces.
Thaw at room temperature for 10–15 minutes before eating.
- Room temperature: Briefly okay for serving, but prolonged warmth softens the fudge. Keep chilled for best texture.
Why This is Good for You
This fudge offers protein to support satiety and muscle repair, especially if you’re active. Using nut butter adds healthy fats and a bit of fiber, which help keep you full and steady your energy.
Cocoa contributes flavanols, natural compounds linked with cardiovascular benefits. By controlling the sweetener and using quality ingredients, you get the pleasure of dessert with a smarter nutrition profile.
Pitfalls to Watch Out For
- Chalky texture: This happens when there’s too much protein powder. Add a splash of milk or a bit more melted coconut oil to bring it back.
- Oily separation: Overheating coconut oil or using very runny nut butter can cause separation.
Stir well and chill promptly. If needed, whisk in an extra tablespoon of protein or cocoa.
- Too sweet or not sweet enough: Sweetness varies by protein powder. Always taste before setting and adjust.
- Crumbly slices: The fudge needs to fully set.
Chill longer, or warm the knife under hot water and wipe dry before slicing.
- Hard as a rock: Freezer-cold fudge can be too firm. Rest at room temperature briefly before serving.
Alternatives
- Nut-free: Swap peanut butter for sunflower seed butter or tahini. Add a pinch more sweetener to balance the bitterness if using tahini.
- Dairy-free/vegan: Use coconut oil and a plant-based protein powder.
Choose maple syrup instead of honey.
- Lower sugar: Use a granular or liquid zero-calorie sweetener designed for baking. Start with less and add to taste.
- Flavor twists: Stir in peppermint extract for a mint-chocolate version, espresso powder for mocha, or cinnamon and a pinch of cayenne for a Mexican chocolate vibe.
- Different proteins: Whey gives a softer fudge; casein makes it denser; plant proteins can be drier—adjust with a splash of milk or extra oil as needed.
FAQ
Can I make this without coconut oil?
Yes. Use melted unsalted butter or a neutral oil like avocado oil.
Butter gives a classic fudge richness, while avocado oil keeps it dairy-free but slightly softer at room temp.
What protein powder works best?
Whey or a whey-casein blend creates a smooth, chewy texture. Plant-based powders work too but can be more absorbent. Start with less and add as needed so the mixture doesn’t dry out.
How do I keep it from tasting powdery?
Fully incorporate the protein powder, and don’t overpack the recipe with it.
Sifting cocoa, mixing thoroughly, and adding a splash of milk can smooth everything out.
Is this safe for kids?
Yes, as long as ingredients are age-appropriate and there are no allergies. Consider using a milder protein powder and keeping portions small. Always check the sweetener type and quantity.
Can I add collagen instead of protein powder?
You can add collagen for an extra protein boost, but collagen won’t thicken like whey or plant protein.
Use it to replace up to one-third of the protein powder, not all of it.
How many grams of protein are in each piece?
It varies by brand. As a rough guide, if you use a protein powder with 20 grams of protein per scoop and the recipe uses about two scoops, you’ll get roughly 2–3 grams of protein per small square (16 pieces) or 4–5 grams per larger bar (12 pieces).
Can I make it in a smaller or larger pan?
Yes. A smaller pan gives thicker pieces and may need a bit more chill time.
A larger pan yields thinner bars that set faster. Keep an eye on the firmness before slicing.
What if my nut butter is very thick?
Warm it gently until stirrable, or add 1–2 tablespoons of warm milk or melted oil when mixing. This helps achieve that glossy, fudge-like consistency.
Do I need to sift the cocoa powder?
It’s not mandatory, but it prevents lumps and creates a smoother finish.
If you skip it, whisk vigorously to break up any clumps.
Can I double the recipe?
Absolutely. Use a 9×13-inch pan and extend the chill time. Be sure to mix in a large bowl so everything combines evenly.
Final Thoughts
This protein fudge checks all the boxes: quick to make, easy to customize, and genuinely delicious.
Keep a batch in the fridge for when you want something sweet that still supports your goals. With a few pantry staples and a mixing bowl, you’ll have smooth, sliceable fudge ready whenever cravings hit. Simple, satisfying, and smart—that’s a win.
Printable Recipe Card
Want just the essential recipe details without scrolling through the article? Get our printable recipe card with just the ingredients and instructions.