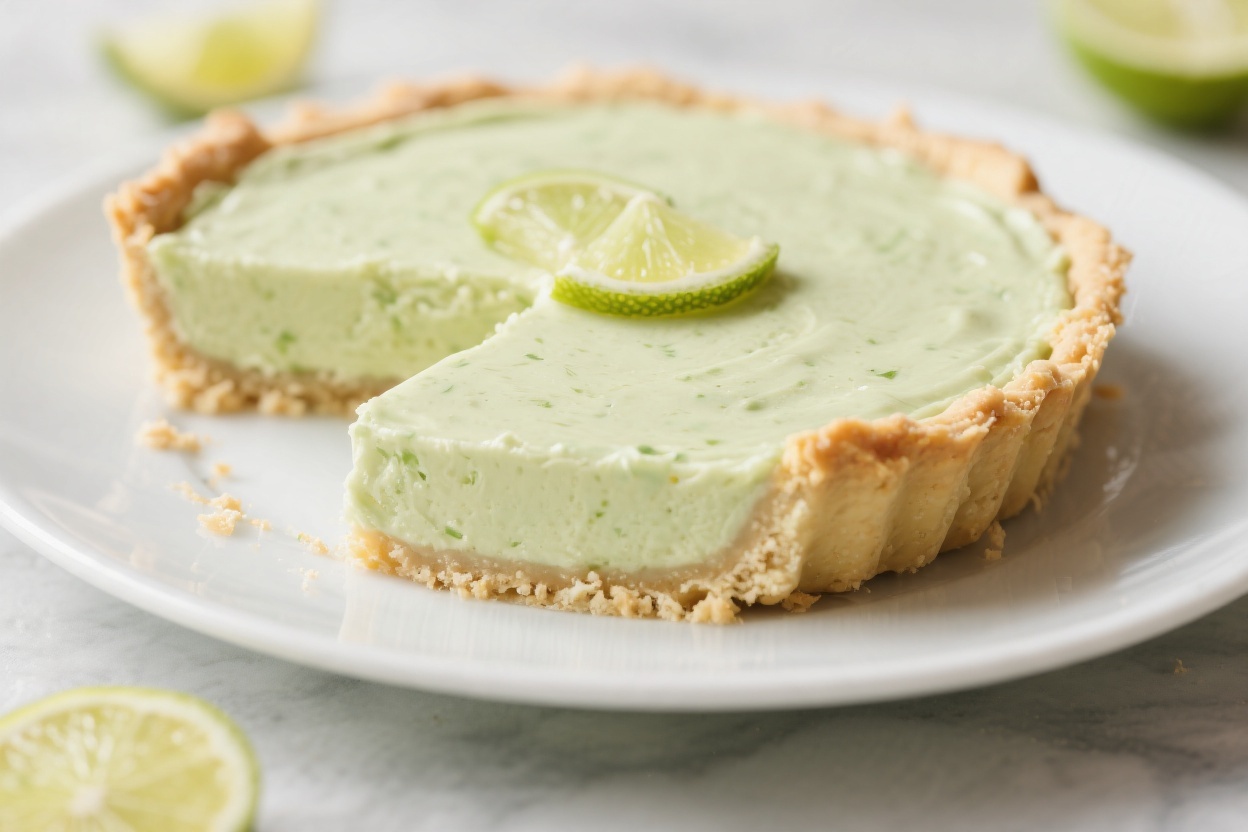
No Bake Key Lime Pie – Bright, Creamy, and Effortless
No bake key lime pie is the kind of dessert that makes people smile before they even take a bite. It’s cold, creamy, and zesty in all the right ways, with a crunchy graham cracker crust that takes almost no effort. There’s no oven involved, no eggs to temper, and no stress about timing.
It sets up in the fridge, so you can make it ahead and forget about it until dessert time. If you love tart-sweet flavors and a silky texture, this is your new go-to pie.
No Bake Key Lime Pie - Bright, Creamy, and Effortless
Ingredients
Method
- Make the crust: In a bowl, combine graham crumbs, granulated sugar, and melted butter. Stir until the mixture resembles wet sand and holds together when pressed.
- Press into the pan: Pour the crust mixture into a 9-inch pie dish.Use the bottom of a measuring cup to press it firmly across the base and up the sides. Refrigerate while you prepare the filling.
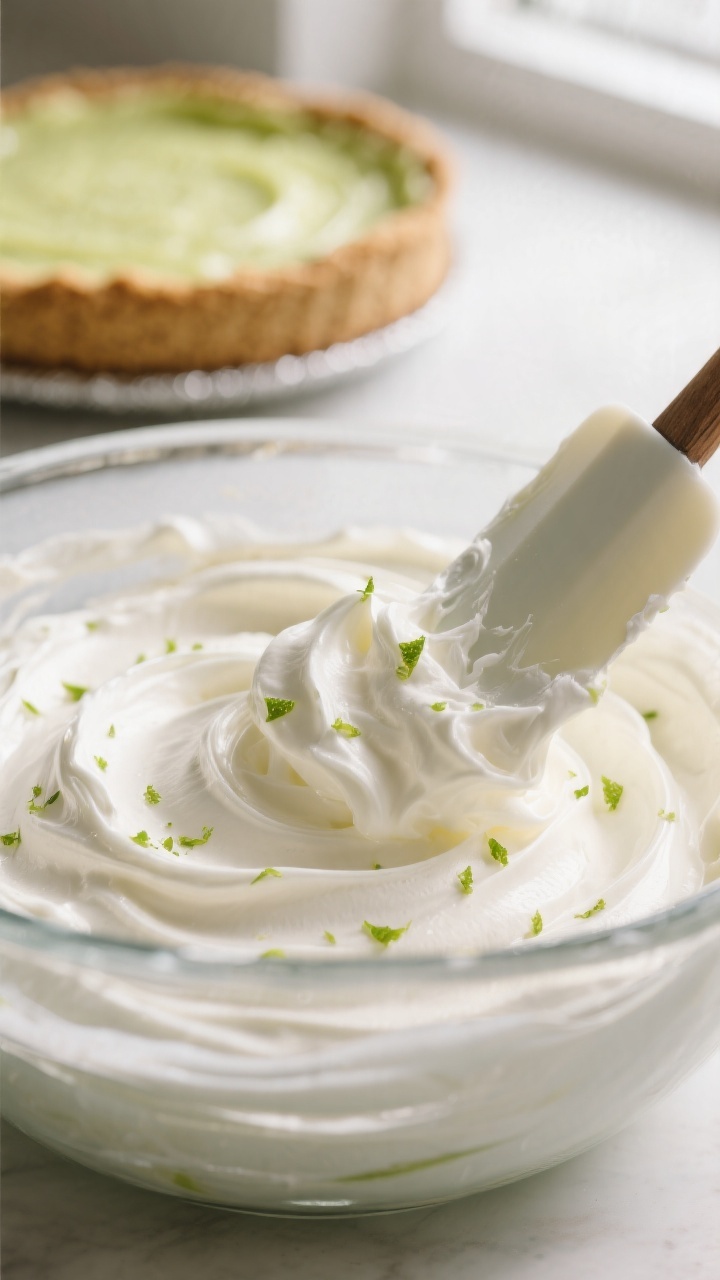
- Whip the cream: In a cold bowl, beat the heavy cream to soft peaks. Set aside.This will lighten the filling’s texture.
- Blend the base: In a separate bowl, beat the softened cream cheese until smooth, with no lumps. Add the sweetened condensed milk, vanilla, and salt. Mix until silky.
- Add the lime: Gently mix in the key lime juice and zest.The mixture will thicken slightly as the lime reacts with the dairy.
- Fold in the whipped cream: Using a spatula, fold the whipped cream into the lime mixture in two or three additions. Keep it gentle so you don’t deflate the air.
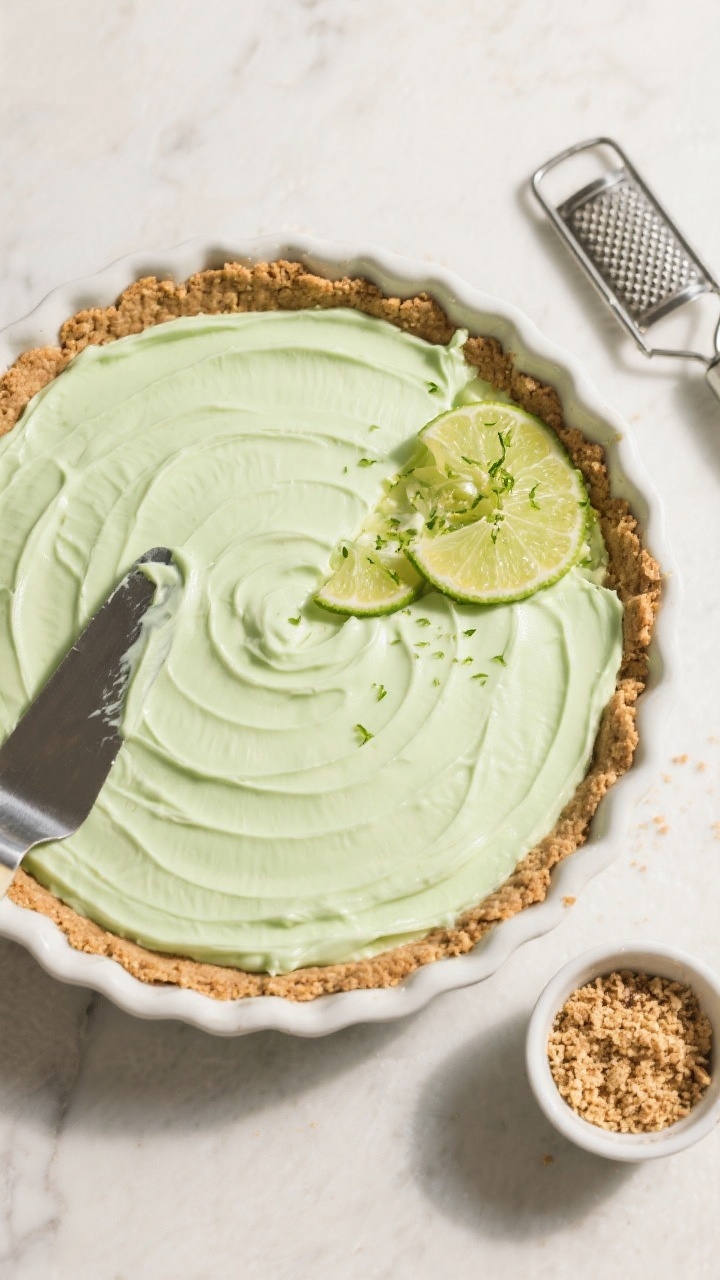
- Fill the crust: Pour the filling into the chilled crust and smooth the top. A small offset spatula makes this easy.
- Chill to set: Cover the pie and refrigerate for at least 4 hours, preferably overnight, until firm and sliceable.
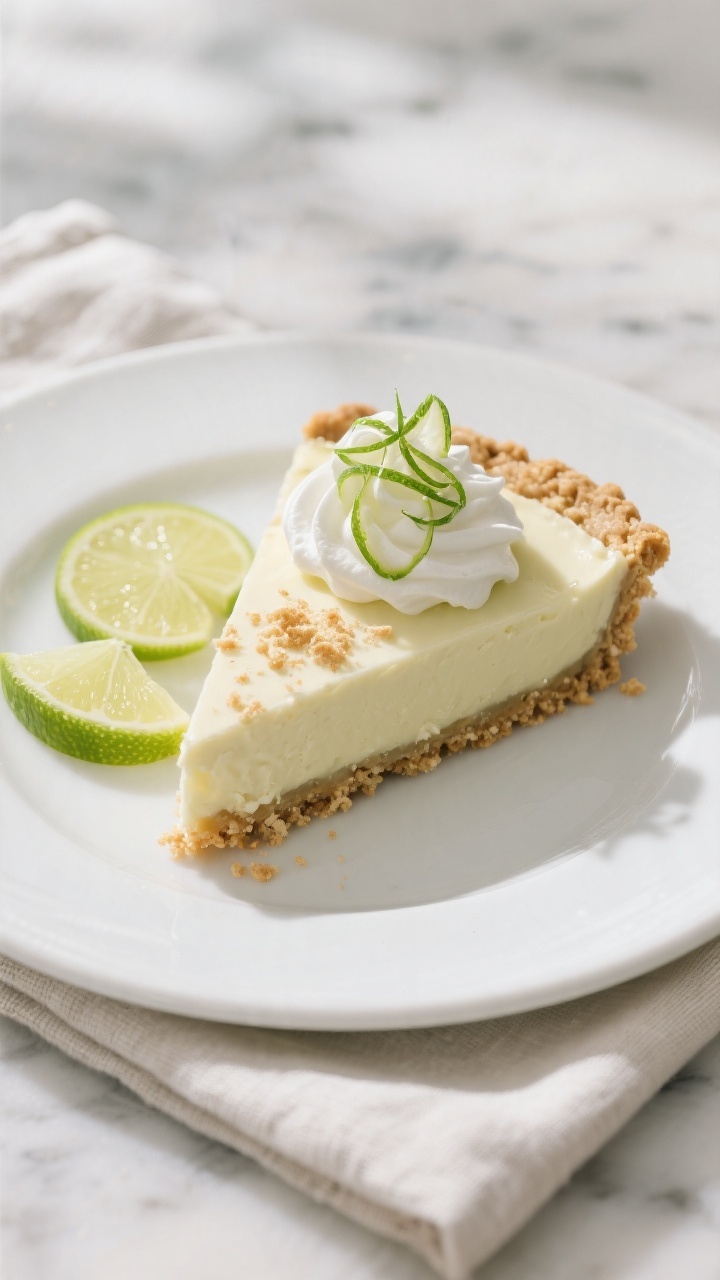
- Garnish and serve: Top with swirls of whipped cream, lime zest, or thin slices.Use a warm knife for clean slices.
What Makes This Recipe So Good
- Bright, bold flavor: Fresh key lime juice and zest deliver a sharp citrus punch balanced by sweet, creamy filling.
- No oven needed: Perfect for hot days or busy schedules. The fridge does all the work.
- Silky texture: Sweetened condensed milk and cream cheese (or sour cream) create a smooth, sliceable filling.
- Make-ahead friendly: It actually tastes better after chilling overnight, so it’s ideal for gatherings.
- Simple, familiar ingredients: Nothing fancy.Just everyday items you can grab at any store.
What You’ll Need (Ingredients)
- Graham cracker crumbs: About 1 1/2 cups (from roughly 12 full sheets). Pre-crushed crumbs work too.
- Unsalted butter: 6 tablespoons, melted, to bind the crust.
- Granulated sugar: 2 tablespoons for the crust, for a touch of sweetness.
- Cream cheese: 8 ounces, softened to room temperature, for body and tang. (See Alternatives if you prefer sour cream.)
- Sweetened condensed milk: One 14-ounce can. This is the backbone of the filling.
- Key lime juice: 1/2 cup, ideally fresh.Bottled key lime juice works in a pinch.
- Lime zest: 1–2 teaspoons, finely grated. Adds aroma and extra zing.
- Heavy whipping cream: 1 cup, whipped to soft peaks, for a lighter, airy finish.
- Vanilla extract: 1 teaspoon, to round out the flavors.
- Pinch of salt: Helps balance the sweetness.
- Optional toppings: Fresh whipped cream, thin lime slices or zest curls, and a few graham crumbs for garnish.
How to Make It
- Make the crust: In a bowl, combine graham crumbs, granulated sugar, and melted butter. Stir until the mixture resembles wet sand and holds together when pressed.
- Press into the pan: Pour the crust mixture into a 9-inch pie dish.Use the bottom of a measuring cup to press it firmly across the base and up the sides. Refrigerate while you prepare the filling.
- Whip the cream: In a cold bowl, beat the heavy cream to soft peaks. Set aside.This will lighten the filling’s texture.
- Blend the base: In a separate bowl, beat the softened cream cheese until smooth, with no lumps. Add the sweetened condensed milk, vanilla, and salt. Mix until silky.
- Add the lime: Gently mix in the key lime juice and zest.The mixture will thicken slightly as the lime reacts with the dairy.
- Fold in the whipped cream: Using a spatula, fold the whipped cream into the lime mixture in two or three additions. Keep it gentle so you don’t deflate the air.
- Fill the crust: Pour the filling into the chilled crust and smooth the top. A small offset spatula makes this easy.
- Chill to set: Cover the pie and refrigerate for at least 4 hours, preferably overnight, until firm and sliceable.
- Garnish and serve: Top with swirls of whipped cream, lime zest, or thin slices.Use a warm knife for clean slices.
Keeping It Fresh
- Refrigeration: Keep the pie covered and refrigerated. It’s best within 2–3 days, though it holds for up to 4.
- Freezing: You can freeze the whole pie (without fresh fruit toppings). Wrap well and freeze up to 1 month.Thaw overnight in the fridge before serving.
- Prevent sogginess: Make sure the crust is firmly packed. If your fridge tends to be humid, store the pie in an airtight container to protect the crust’s texture.
Health Benefits
- Vitamin C boost: Key limes are loaded with vitamin C, which supports immune health and helps with iron absorption.
- Portion control is easy: The pie is rich, so small slices satisfy. That can help limit overall sugar and calorie intake.
- Simple ingredient list: Fewer additives than many store-bought desserts, especially if you use freshly squeezed juice and real whipped cream.
- Balanced fats: The filling contains dairy fats that help provide a satisfying dessert with fewer cravings afterward.
What Not to Do
- Don’t skip softening the cream cheese: Cold cream cheese creates lumps that are tough to smooth out later.
- Don’t use regular milk instead of condensed milk: The filling won’t set right or taste correct.
- Don’t rush the chill time: If you cut too soon, the pie will slump.Plan for at least 4 hours, ideally overnight.
- Don’t overmix after adding whipped cream: Overmixing deflates the air and makes the filling dense.
- Don’t rely only on bottled lime juice if you can help it: Fresh zest adds fragrance and flavor that bottled juice can’t match.
Alternatives
- No cream cheese version: Swap the cream cheese for 3/4 cup sour cream for a softer, tangier filling. It sets a bit looser but tastes classic.
- Coconut twist: Fold in 1/2 cup toasted coconut and use coconut whipped cream for topping. It pairs beautifully with lime.
- Gluten-free crust: Use gluten-free graham crackers or crushed gluten-free cookies.Add a pinch more butter if the crumbs seem dry.
- Nutty crust: Replace 1/3 of the graham crumbs with finely ground almonds or pecans for extra flavor and crunch.
- Meyer lemon or regular lime: If you can’t find key limes, use regular limes or Meyer lemons. The flavor will be slightly different but still bright and refreshing.
- Lighten it up: Use reduced-fat cream cheese and whip 3/4 cup cream instead of 1 cup. The texture will be lighter and a bit less rich.
- Mini pies: Press the crust into a muffin tin lined with paper cups and spoon in the filling.Chill and peel away the liners for easy individual servings.
FAQ
Can I use regular lime juice instead of key lime juice?
Yes. Regular limes make an excellent pie, just a touch less floral and slightly more sharp. Add a little extra zest to boost aroma if you like.
How long does it take to set?
Plan for 4–6 hours in the fridge, but overnight gives the cleanest slices and the best texture.
The longer chill also helps the flavors meld.
Why is my filling runny?
Usually it’s from not chilling long enough or using the wrong ingredients. Make sure you used sweetened condensed milk, not evaporated or regular milk, and give it adequate time to set.
Can I make it ahead for a party?
Absolutely. Make it a day in advance, keep it covered in the fridge, and garnish just before serving.
It holds well and slices beautifully.
What’s the best way to zest limes?
Use a microplane and only grate the green layer. The white pith underneath is bitter. Zest before juicing to make it easier.
Is there a way to cut the sweetness?
Try adding an extra teaspoon of zest and a pinch more salt.
You can also cut back the crust sugar or use a slightly more tart lime juice blend.
Can I make this dairy-free?
Yes. Use a dairy-free sweetened condensed coconut milk and a dairy-free cream cheese. Whip coconut cream for the folded-in and topping components.
In Conclusion
No bake key lime pie delivers big flavor with almost no fuss.
It’s tangy, creamy, and cool, which makes it perfect for warm days and stress-free entertaining. With simple ingredients and a few easy steps, you’ll have a dessert that looks polished and tastes like summer. Make it ahead, keep it chilled, and enjoy every bright, zesty bite.
Printable Recipe Card
Want just the essential recipe details without scrolling through the article? Get our printable recipe card with just the ingredients and instructions.