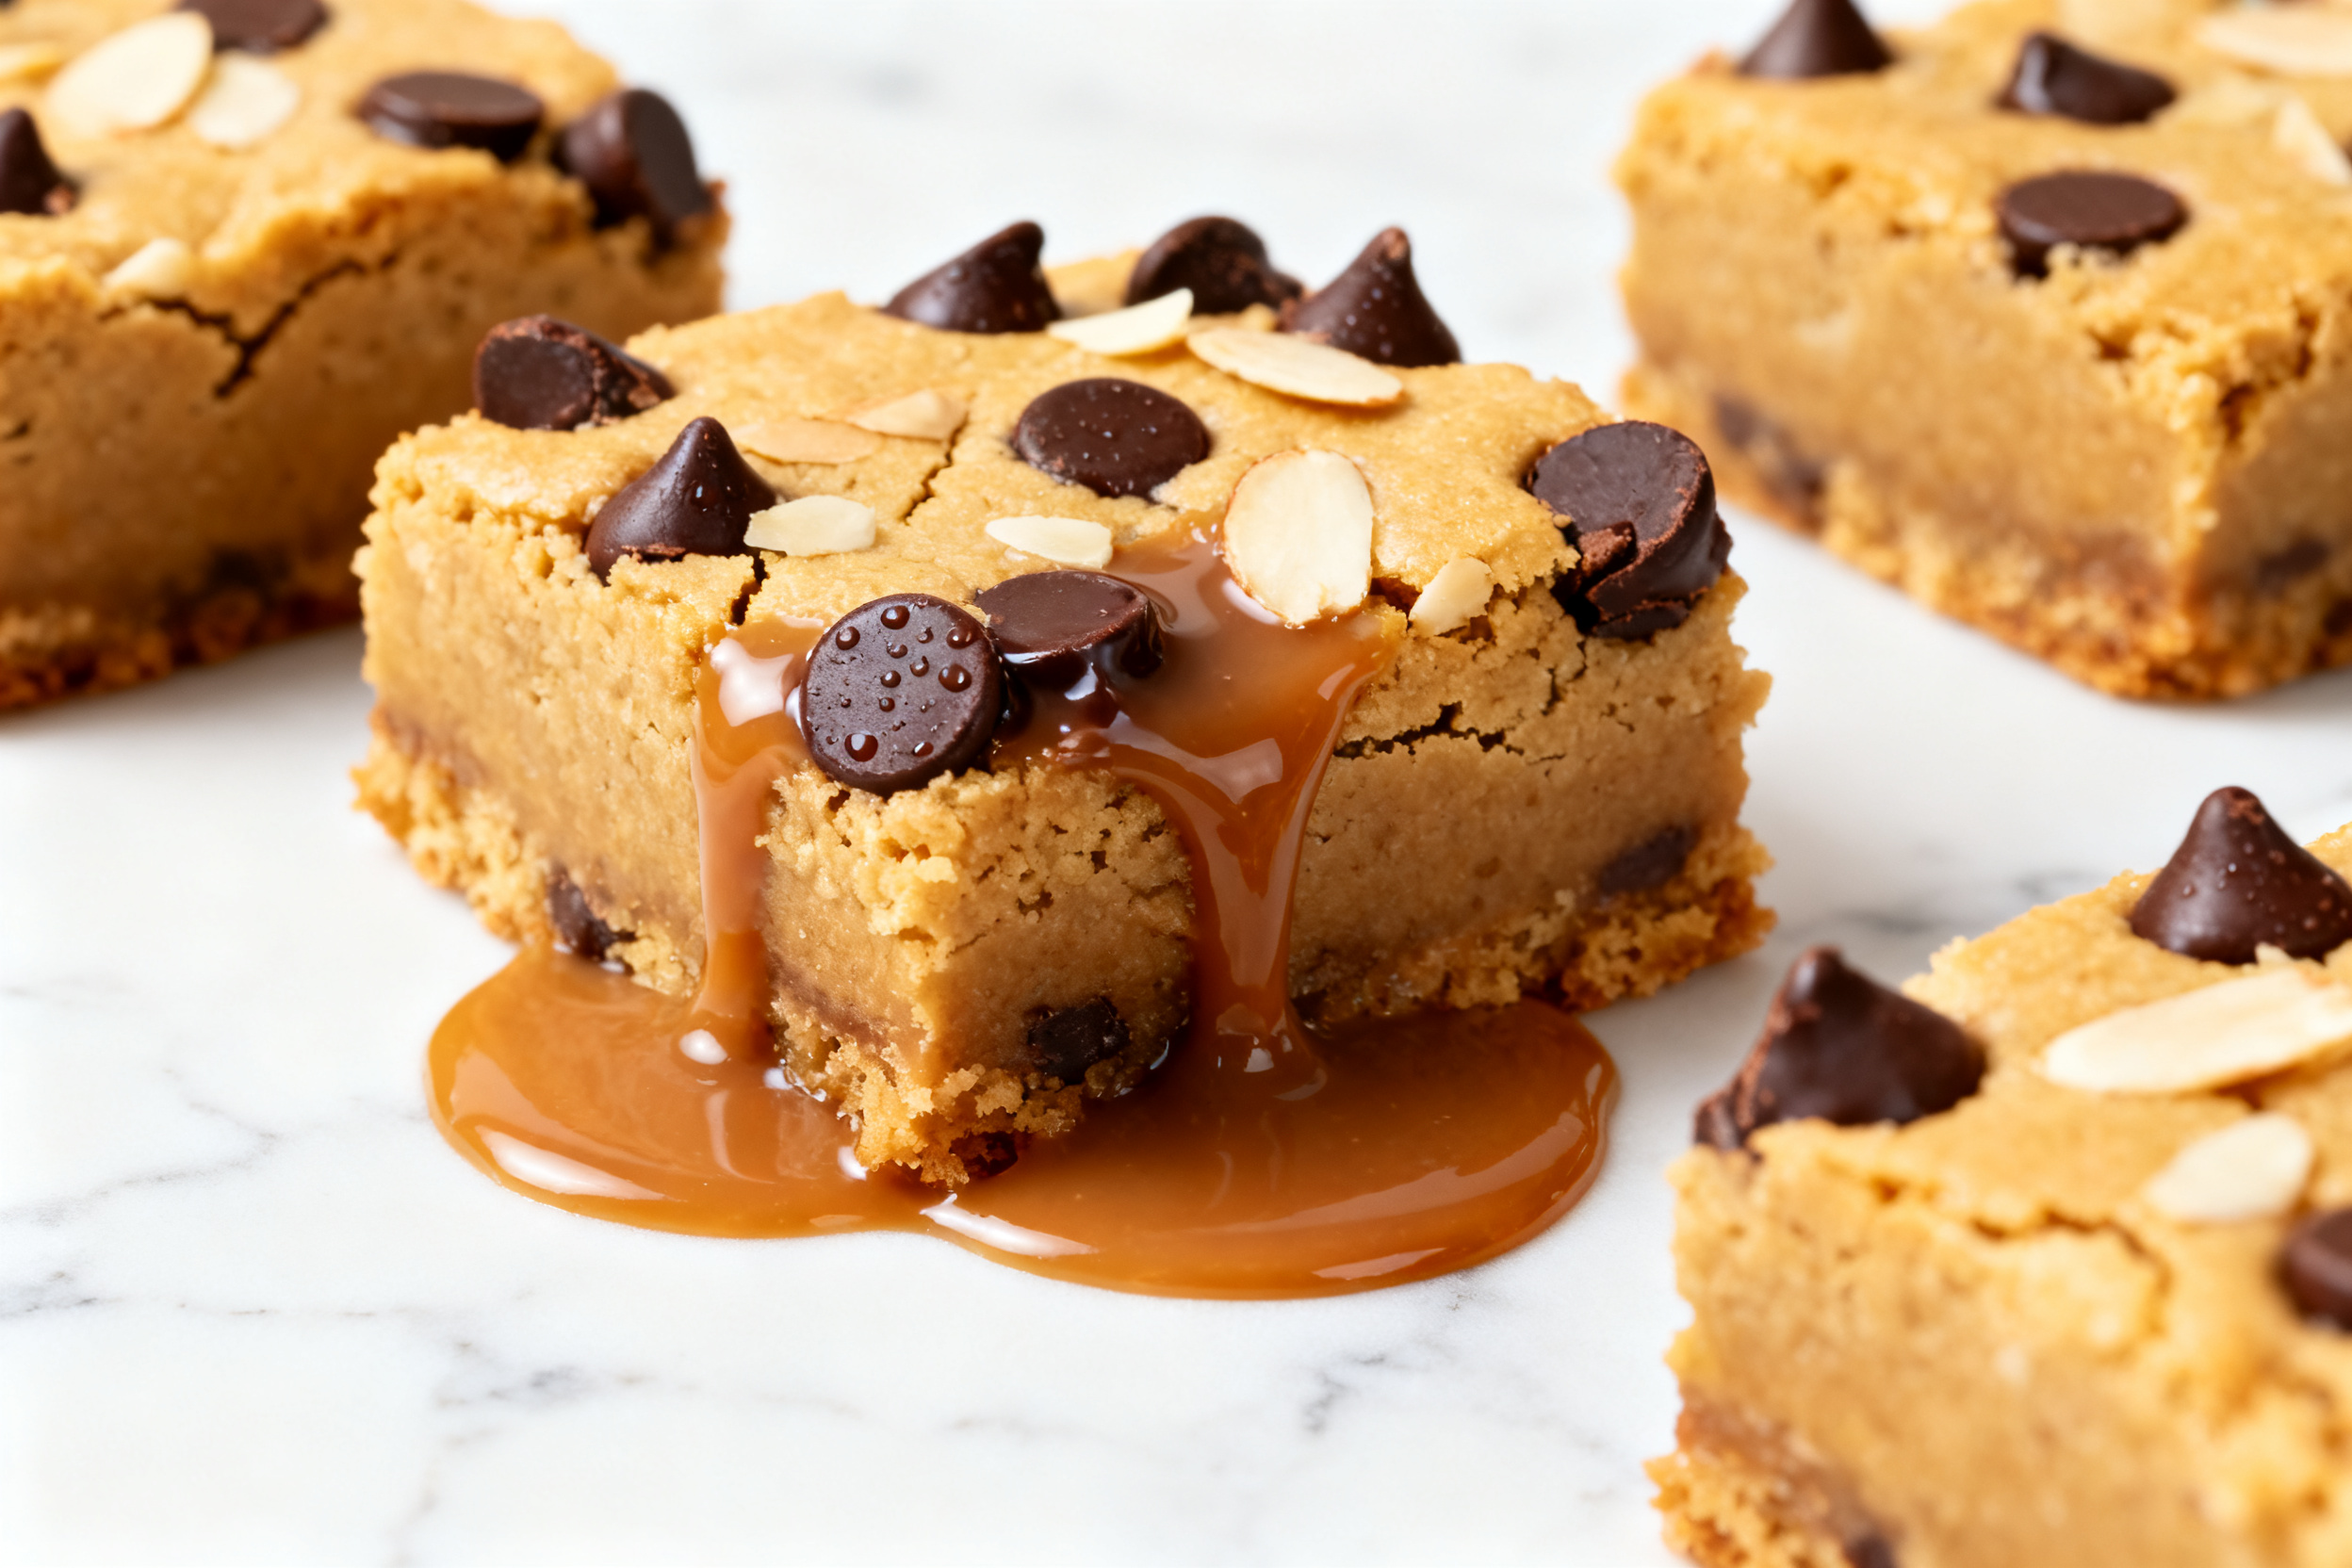
Protein Blondies – Soft, Chewy, and Satisfying
Protein blondies are the kind of treat that makes snack time feel good again. They’re soft, chewy, and sweet without leaving you sluggish. You get the comfort of a classic blondie with a boost of protein that actually keeps you full.
Make a batch on Sunday and you’ve got grab-and-go fuel for the week. No special equipment, no complicated steps—just a bowl, a whisk, and a baking pan.
Ingredients
Method
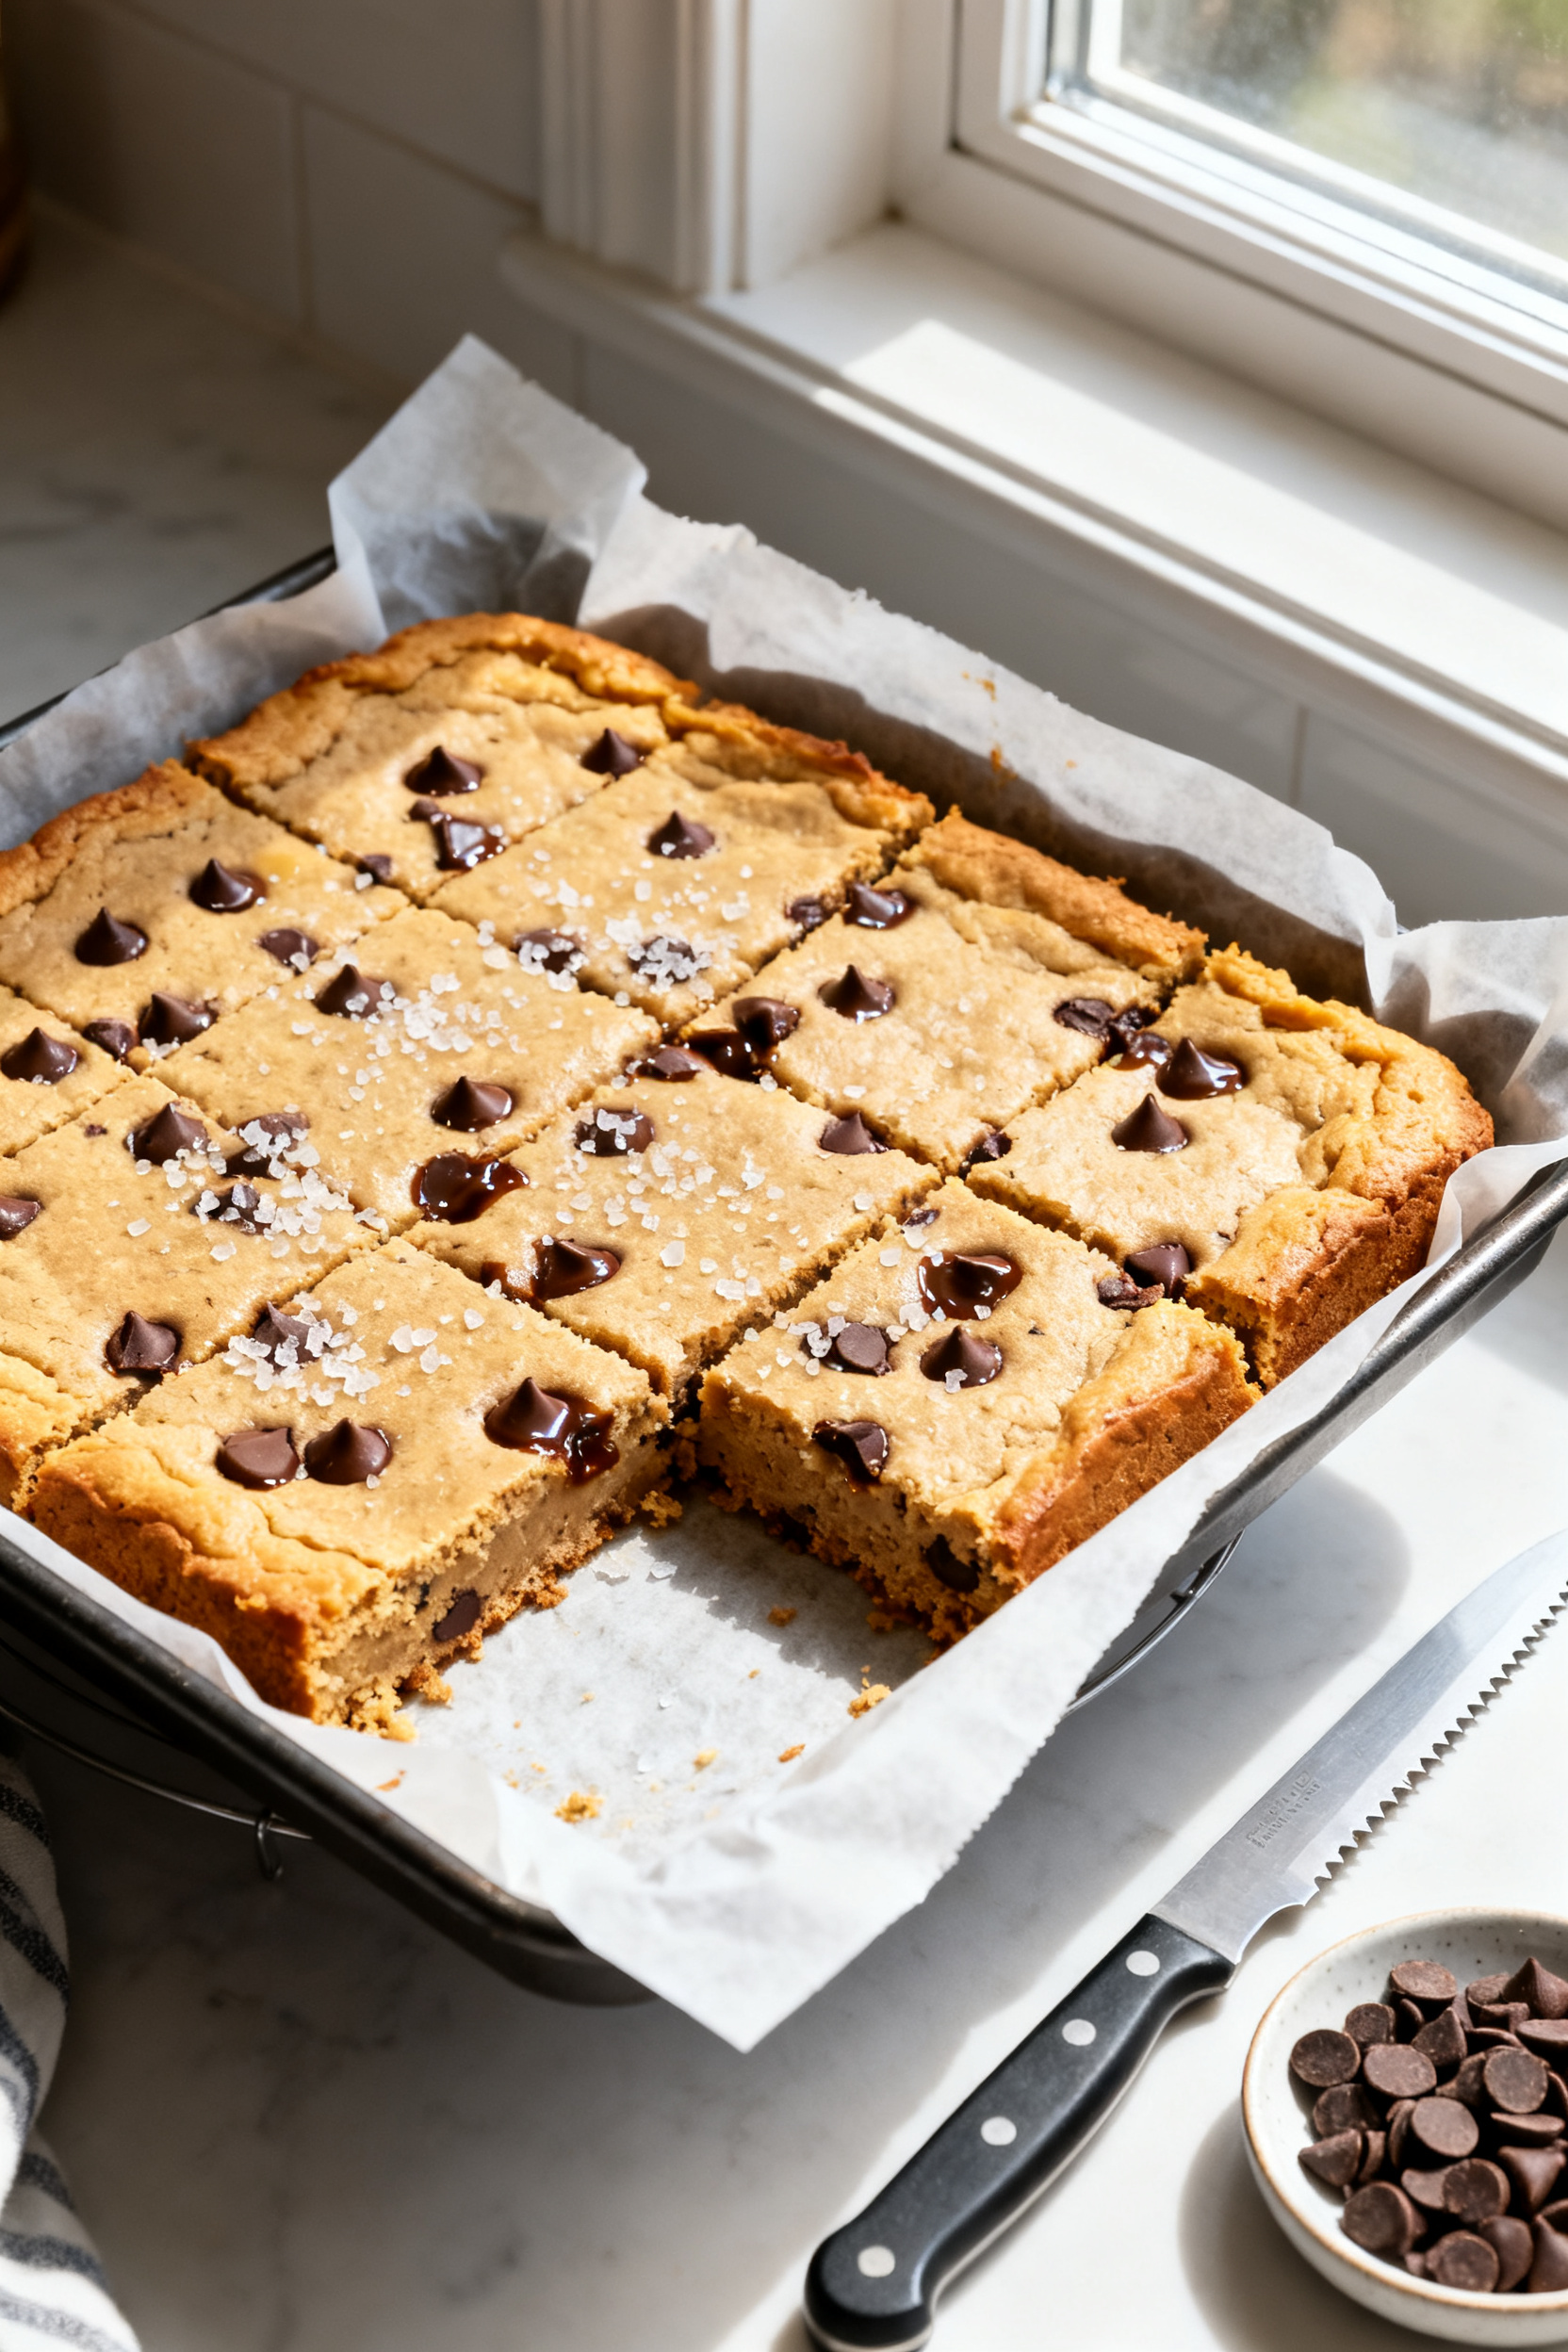
- Preheat and prep: Heat the oven to 350°F (175°C).Line an 8×8-inch pan with parchment, leaving overhang for easy lifting. Lightly spray the parchment.
- Whisk the dry ingredients: In a medium bowl, whisk 1 cup oat flour, 1/2 cup protein powder, 1 teaspoon baking powder, and 1/4 teaspoon salt. If your protein is very sweet, you can reduce the sugar slightly later.
- Mix the wet ingredients: In a large bowl, whisk 1/2 cup light brown sugar with 2 large eggs until glossy, about 30 seconds.Whisk in 1/3 cup melted butter (slightly cooled), 1/3 cup almond butter, 1/3 cup milk, and 2 teaspoons vanilla until smooth.
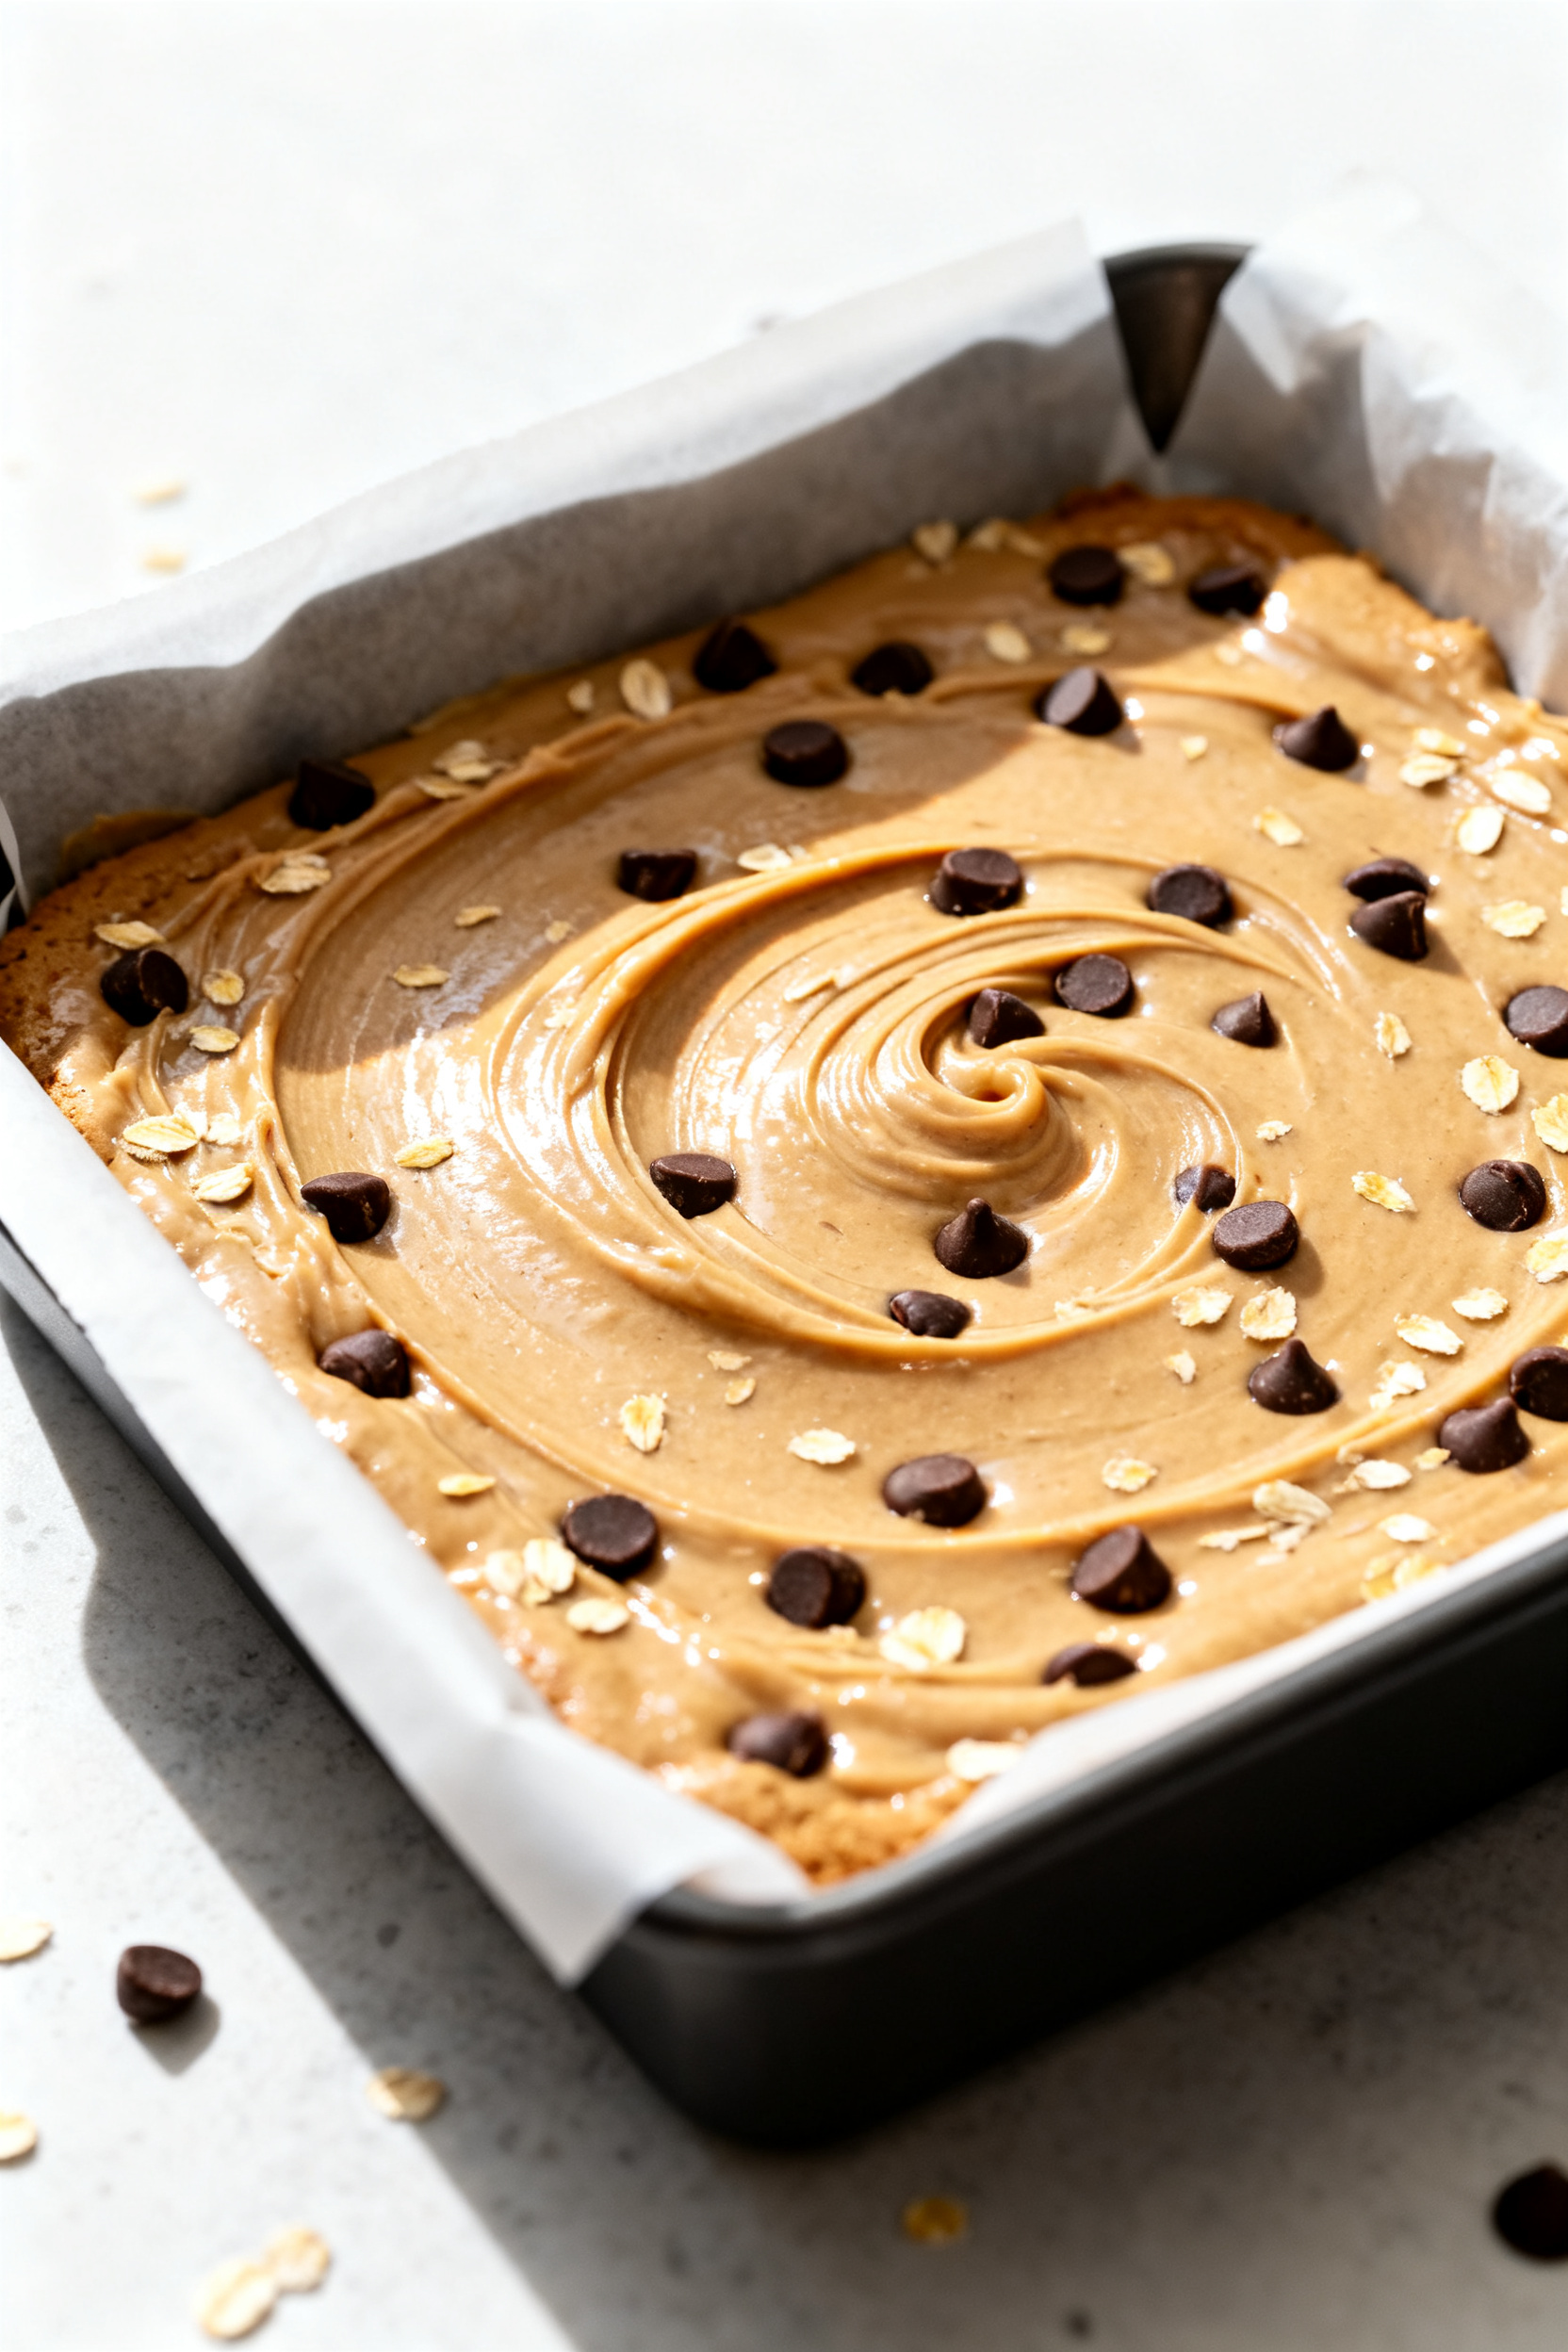
- Combine wet and dry: Add the dry mixture to the wet bowl. Stir with a spatula until just combined. The batter should be thick but spreadable.If it looks dry or crumbly, add 1–2 tablespoons more milk.
- Fold in the chocolate: Stir in 1/2 cup chocolate chips. Save a few to scatter on top for a bakery look.
- Spread and level: Scrape the batter into the prepared pan. Use a spatula to smooth into an even layer.Sprinkle the remaining chips on top.
- Bake: Bake 18–22 minutes, until the edges are set and lightly golden and the center looks just barely done. A toothpick should come out with a few moist crumbs, not wet batter.
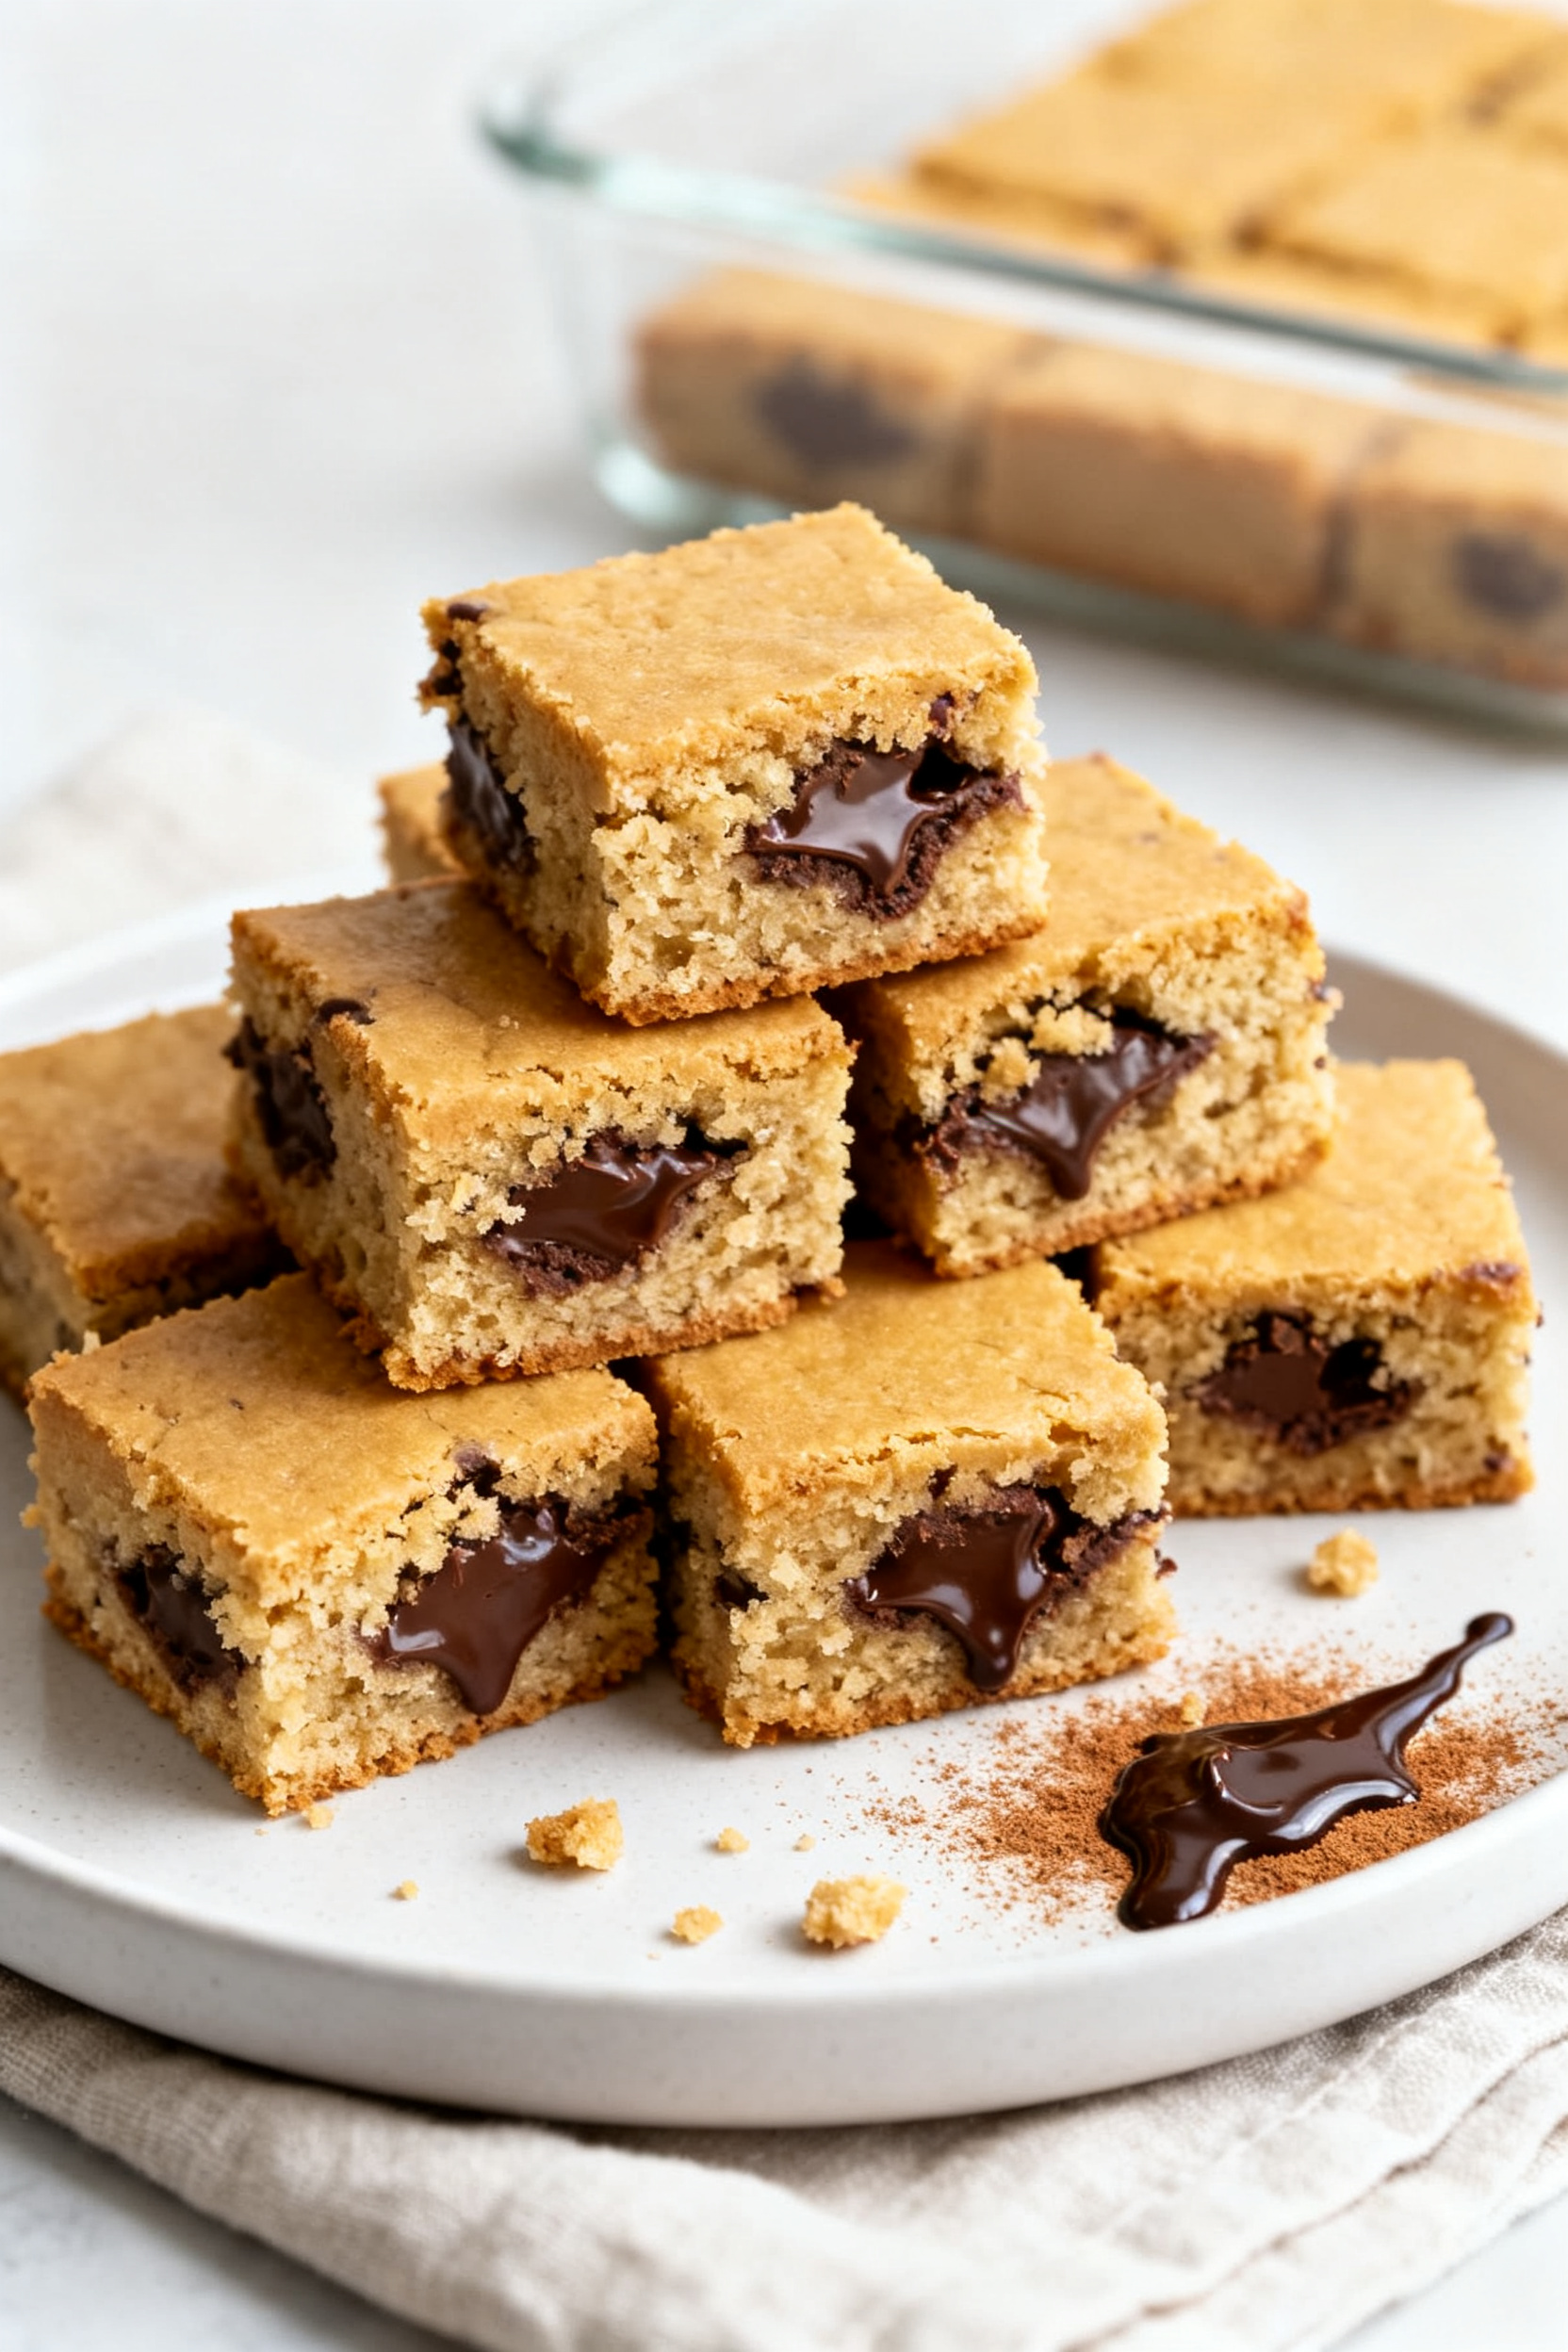
- Cool completely: Let the blondies cool in the pan for at least 30 minutes. Lift out using the parchment and cool another 15 minutes before slicing.They firm up as they cool, so don’t rush this part.
- Slice and serve: Cut into 12 squares for snack-size servings. Sprinkle with a pinch of flaky salt if you like sweet-salty contrast.
Why This Recipe Works
Most protein desserts taste chalky or dry. These don’t.
The batter balances moisture from nut butter and milk with structure from protein powder and oat flour, so you get a tender crumb instead of a rubbery bar. Brown sugar and vanilla give real blondie flavor, while a touch of baking powder adds lift. A handful of chocolate chips pulls it all together with that classic gooey bite.
Shopping List (Ingredients)
- Vanilla or unflavored whey protein powder (or a whey/casein blend)
- Oat flour (or finely ground rolled oats)
- Almond butter (or peanut butter, smooth)
- Light brown sugar
- Eggs
- Unsweetened almond milk (or regular milk)
- Unsalted butter (melted) or coconut oil
- Vanilla extract
- Baking powder
- Fine sea salt
- Chocolate chips (semi-sweet or dark)
- Optional: cinnamon, flaky salt, chopped nuts, or white chocolate chips
- Nonstick spray or parchment paper for the pan
Step-by-Step Instructions
- Preheat and prep: Heat the oven to 350°F (175°C).
Line an 8×8-inch pan with parchment, leaving overhang for easy lifting. Lightly spray the parchment.
- Whisk the dry ingredients: In a medium bowl, whisk 1 cup oat flour, 1/2 cup protein powder, 1 teaspoon baking powder, and 1/4 teaspoon salt. If your protein is very sweet, you can reduce the sugar slightly later.
- Mix the wet ingredients: In a large bowl, whisk 1/2 cup light brown sugar with 2 large eggs until glossy, about 30 seconds.
Whisk in 1/3 cup melted butter (slightly cooled), 1/3 cup almond butter, 1/3 cup milk, and 2 teaspoons vanilla until smooth.
- Combine wet and dry: Add the dry mixture to the wet bowl. Stir with a spatula until just combined. The batter should be thick but spreadable.
If it looks dry or crumbly, add 1–2 tablespoons more milk.
- Fold in the chocolate: Stir in 1/2 cup chocolate chips. Save a few to scatter on top for a bakery look.
- Spread and level: Scrape the batter into the prepared pan. Use a spatula to smooth into an even layer.
Sprinkle the remaining chips on top.
- Bake: Bake 18–22 minutes, until the edges are set and lightly golden and the center looks just barely done. A toothpick should come out with a few moist crumbs, not wet batter.
- Cool completely: Let the blondies cool in the pan for at least 30 minutes. Lift out using the parchment and cool another 15 minutes before slicing.
They firm up as they cool, so don’t rush this part.
- Slice and serve: Cut into 12 squares for snack-size servings. Sprinkle with a pinch of flaky salt if you like sweet-salty contrast.
How to Store
Keep blondies in an airtight container at room temperature for up to 3 days. For longer storage, refrigerate for 5–6 days; they’ll stay chewy and hold their shape.
To freeze, wrap individual squares in plastic, place in a freezer bag, and freeze for up to 3 months. Thaw on the counter for 30–45 minutes, or microwave in 10–15 second bursts.
Benefits of This Recipe
- High in protein: A smart swap for standard blondies, which are mostly sugar and flour.
- Better texture than most protein bakes: The mix of oat flour, nut butter, and just enough fat keeps them soft.
- Quick and simple: One bowl for wet, one for dry, and under 25 minutes in the oven.
- Flexible: Works with different nut butters, milks, and add-ins without losing structure.
- Meal-prep friendly: Easy to portion, pack, and enjoy all week.
Pitfalls to Watch Out For
- Overbaking: This is the fastest way to dry, spongy blondies. Pull them when the center looks slightly underdone; they’ll set as they cool.
- Using only whey isolate: Pure whey can make bakes rubbery.
If possible, use whey concentrate or a whey/casein blend. If using isolate, add an extra tablespoon of almond butter or milk to keep moisture.
- Too much flour or powder: Scooping densely packed oat flour or protein powder can throw off ratios. Fluff, spoon, and level with a knife for accuracy.
- Hot butter meeting cold eggs: If the butter is too hot, it can scramble the eggs or seize the nut butter.
Let melted butter cool to warm before mixing.
- Cutting too soon: They’ll crumble if sliced hot. Cooling creates that classic fudgy-chewy middle.
Alternatives
- Dairy-free: Use a plant-based protein blend (pea + rice works best), coconut oil instead of butter, and non-dairy milk.
- Gluten-free: Use certified gluten-free oats for the oat flour. Skip wheat flour entirely—this recipe doesn’t need it.
- Lower sugar: Reduce brown sugar to 1/3 cup and add 1–2 tablespoons maple syrup or a granulated sweetener you like.
Note: texture may be slightly less gooey.
- Peanut butter version: Swap almond butter for peanut butter for a stronger, nostalgic flavor. Dark chocolate pairs well.
- Mix-ins: Try chopped walnuts, toasted pecans, white chocolate chips, or a swirl of raspberry jam for a blondie-meets-PB&J moment.
- Spice it up: Add 1/2 teaspoon cinnamon or a pinch of cardamom for warmth.
FAQ
Can I use coconut flour instead of oat flour?
Not directly. Coconut flour is far more absorbent, and a 1:1 swap will make the batter dry and crumbly.
If coconut flour is your only option, use just 2–3 tablespoons and increase the milk until you get a thick, spreadable batter, but expect a different texture.
What protein powder works best?
A whey concentrate or whey/casein blend gives the softest, most brownie-like crumb. Plant-based blends can work, but you’ll likely need a splash more milk and a minute less baking time to prevent dryness. Pure whey isolate can be used with extra moisture added.
How do I make them sweeter without adding more sugar?
Use a vanilla-flavored protein powder, add a few more chocolate chips, or drizzle a little melted white chocolate on top.
A small amount of monk fruit or stevia blend can also increase sweetness without changing texture much.
Why are my blondies crumbly?
You may have overbaked them or packed too much oat flour/protein into the measuring cups. Next time, spoon and level your dry ingredients and pull them from the oven when the center still looks a touch soft.
Can I double the recipe?
Yes. Bake in a 9×13-inch pan and add a few extra minutes to the bake time.
Start checking at 20 minutes and pull when the center has a slight jiggle and edges are set.
Do these taste like protein bars?
No. The nut butter, brown sugar, and vanilla give a true blondie flavor and chewy texture, with the protein quietly doing its job in the background.
How much protein is in each square?
It depends on your protein powder, but with standard whey and the amounts listed, each of 12 squares lands around 8–10 grams of protein. Check your specific brand for exact numbers.
Can I make them egg-free?
Yes.
Use two flax eggs (2 tablespoons ground flaxseed mixed with 5 tablespoons water, rested 5–10 minutes). Bake time may vary by a minute or two, and the blondies will be slightly denser but still tasty.
In Conclusion
Protein blondies bridge the gap between a sweet craving and a smart snack. They’re simple to mix, quick to bake, and flexible enough to fit most kitchens and diets.
Keep the bake time short, let them cool, and enjoy a chewy square whenever you want something satisfying. One pan today means better snacking all week.
Printable Recipe Card
Want just the essential recipe details without scrolling through the article? Get our printable recipe card with just the ingredients and instructions.